Connect with me!
Vegetable Way
  • Blog
  • About
  • Recipe Index
  • Restaurant Reviews

Chickpea Salad Sandwich

9/5/2017

0 Comments

 
Picture
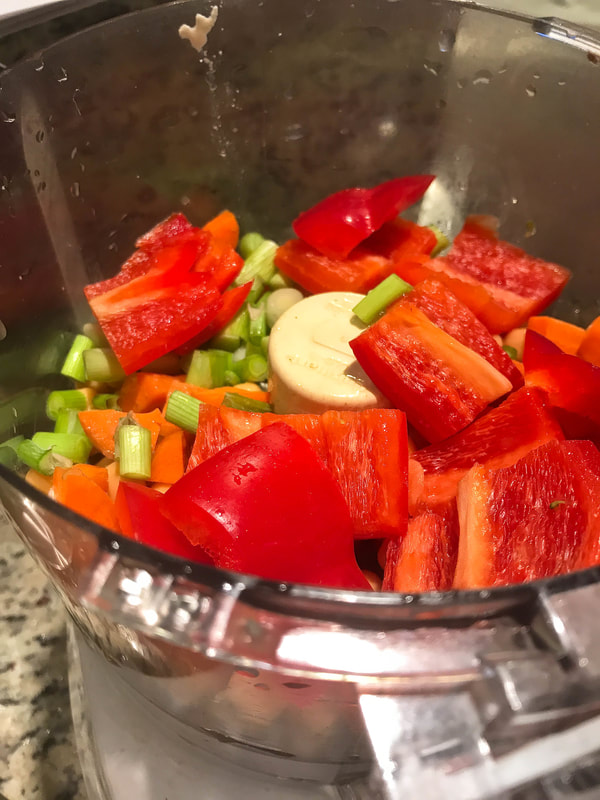
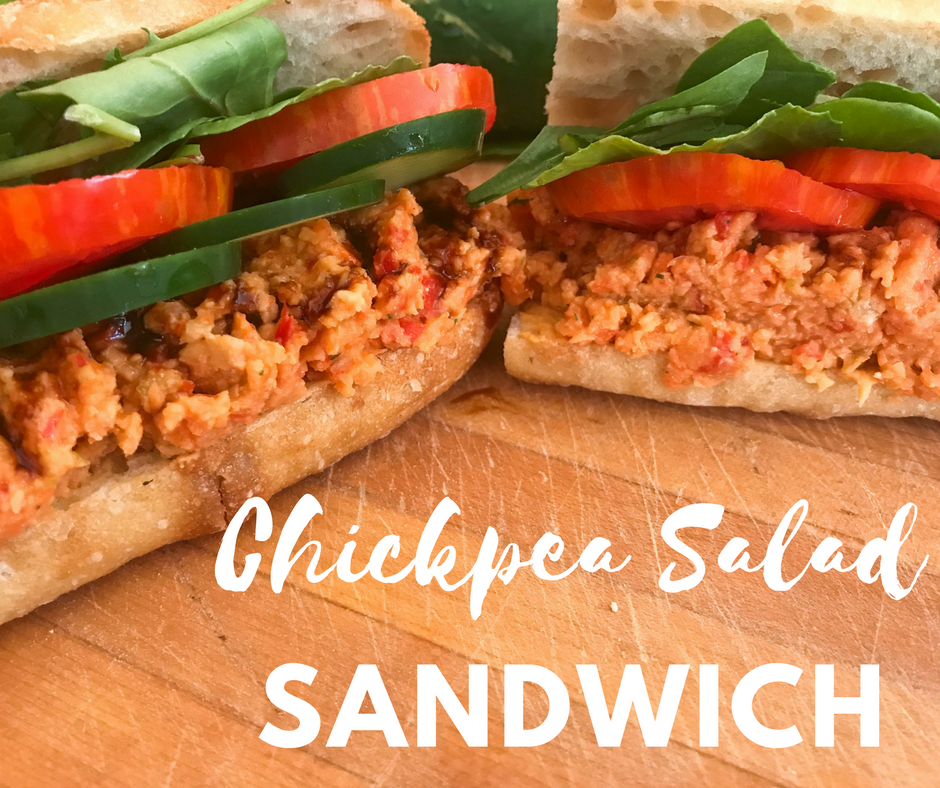
Hope everyone had a great Labor Day weekend. We went on a picnic to the beach and I packed these great sandwiches. They are super easy to make and you can customize them to your preference. Most people like to use celery in these salads, but I'm not a huge fan of celery so I used green onions instead. I had carrots and red pepper on hand so I through them in. You can add whatever crunchy vegetables you like. 

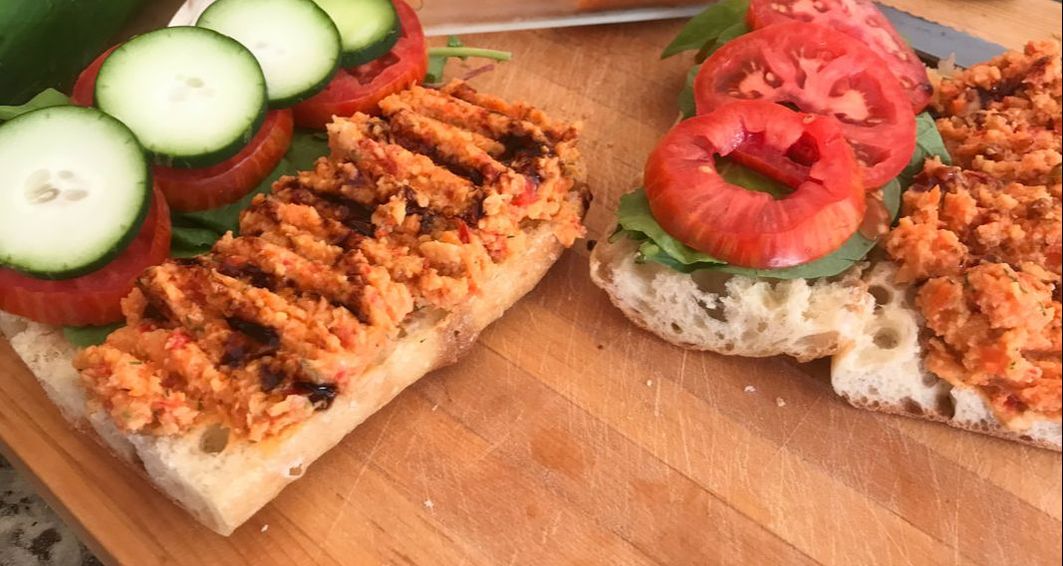
In addition to making great picnics, this sandwich is also great to pack for lunches as school or work. Make sure that you put a layer of greens between the tomatoes and the bread so that your bread doesn't get soggy during the day. 

Let me know how you like it and what your favorite sandwich toppings are! 
Picture
Picture
Ingredients:
1 Can of chickpeas
1 Red pepper
1 Bunch of green onions 
1 Carrot
1/2 Cup Tofu Sour Cream
1 Tablespoon Fresh Dill

1 Half of a baguette (or other sandwich bread)
1 Small-medium sized tomato 
Half of a medium cucumber
1 Cup of lettuce/greens
1 Avocado
2 Tablespoons hummus
Balsamic glaze for garnish (optional)
Servings: 2 sandwiches with some leftover chickpea salad
​Prep Time: 15 minutes
Cook Time: 0
Picture
Instructions: 

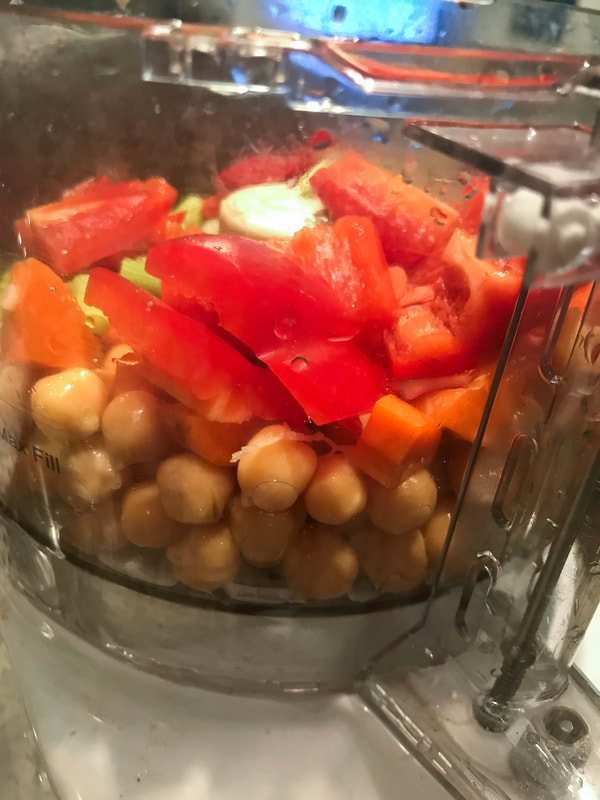
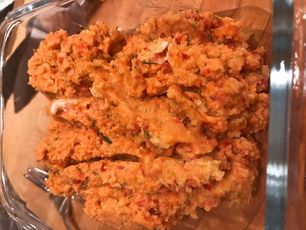
Drain and Rinse chickpeas. Slice green onions up until they start turning dark green. Chop carrots and red peppers to be roughly the same size of the chickpeas and green onions so that they'll all process the same way in the food processor. Add chickpeas, red pepper, green onions, carrot, dill, and sour cream to a food processor and process until it is the consistency of chicken or tuna salad (or the consistency you prefer). 

Cut the baguette in half and then slice open in the middle. Layer the hummus, greens and slices of tomato, cucumber, and avocado on one side of the sandwich. Add the chickpea salad to the other side and fold in half. 

Serve and enjoy!
Picture
0 Comments

Thai Green Curry

2/27/2017

0 Comments

 
Picture
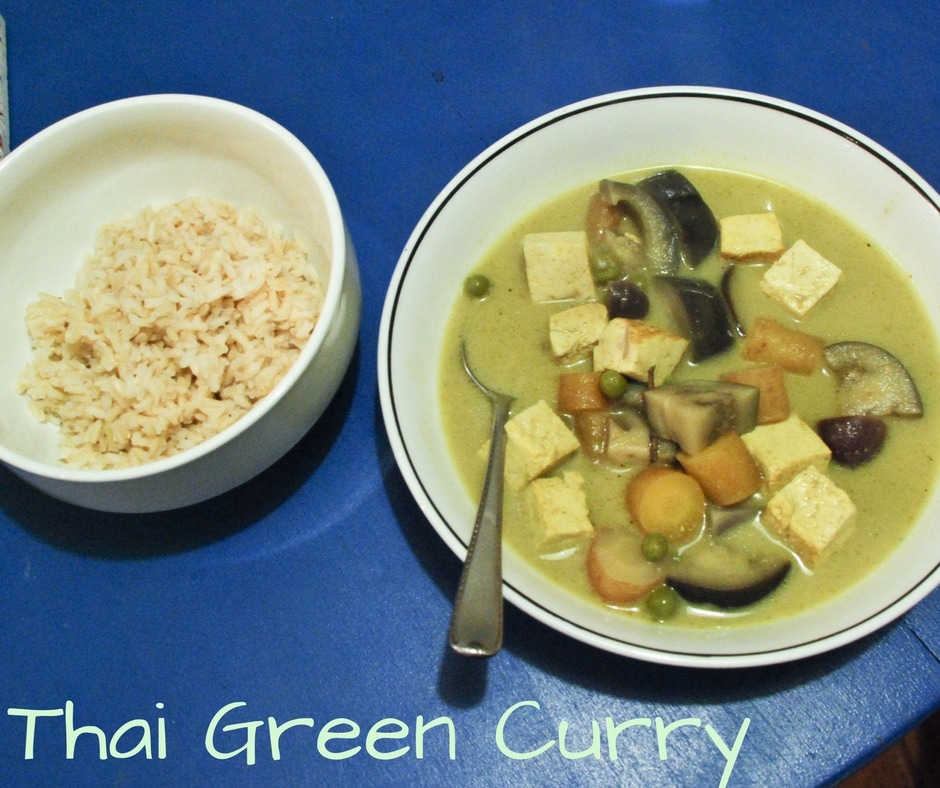
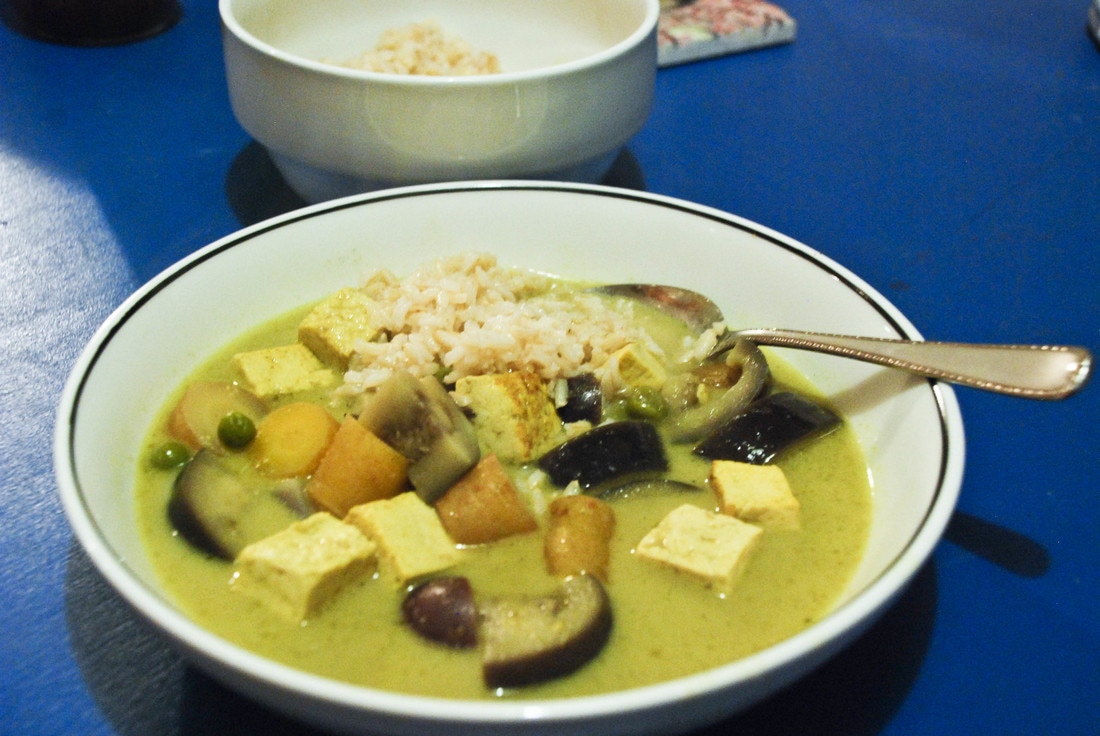
I've been on a Thai Curry kick recently. There's something about the combination of the spicy broth and coconut cream that I love. When you take a bite its so spicy and intense, and then the coconut sweetness comes in just enough for your mouth to recover before the next bite.  Plus, with all the veggies I always feel good about ordering it for delivery. 
Picture
I wanted to try cooking it for myself, for the challenge of trying something new, but also so that I could have it more frequently and not have to pay for delivery! Surprisingly, it was a lot easier than I thought! I found a lot of great resources on the website, Rachel Cooks Thai, and was able to come up with a great recipe.
Picture
Picture
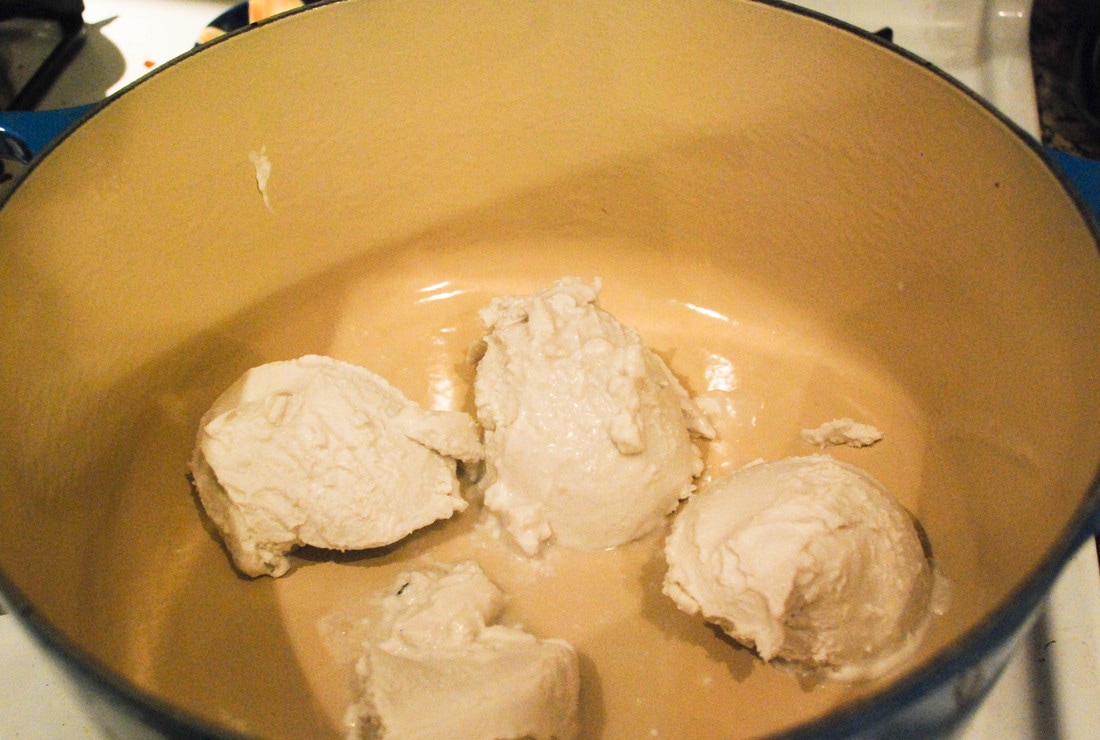
One of the main differences I made was using two cans of coconut milk instead of one. Rachel talks about customizing the balance of coconut milk to water based on your own preferences. I made an earlier batch with only one can of milk and more water and I really didn't feel like I could taste the coconut flavor at all. 
Picture
Picture
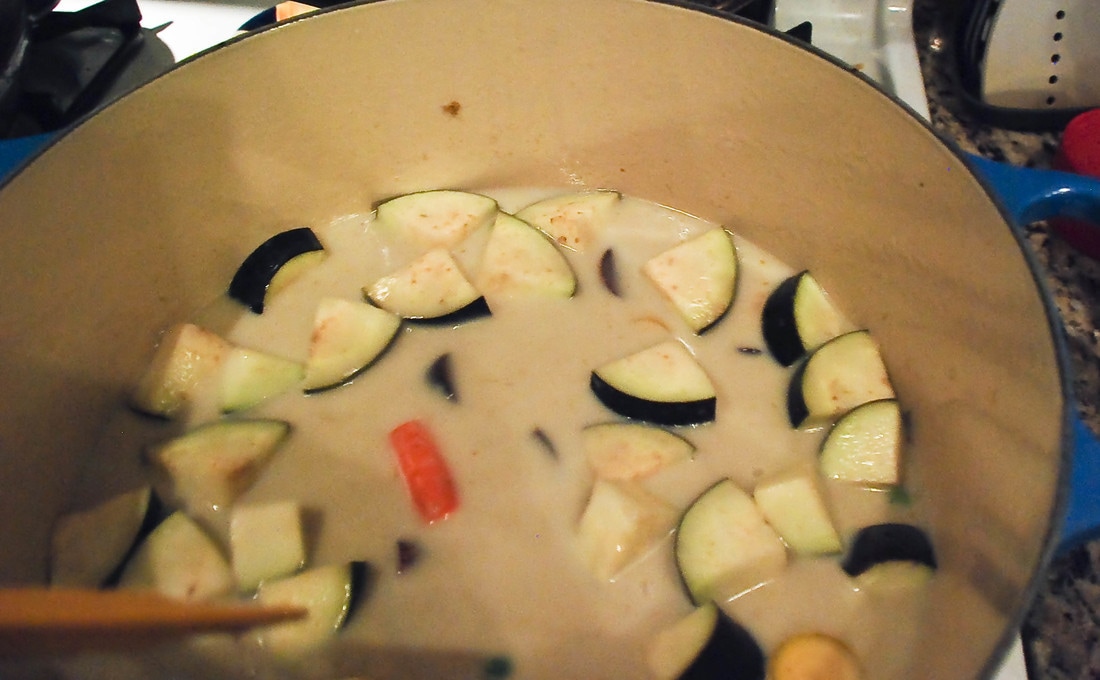
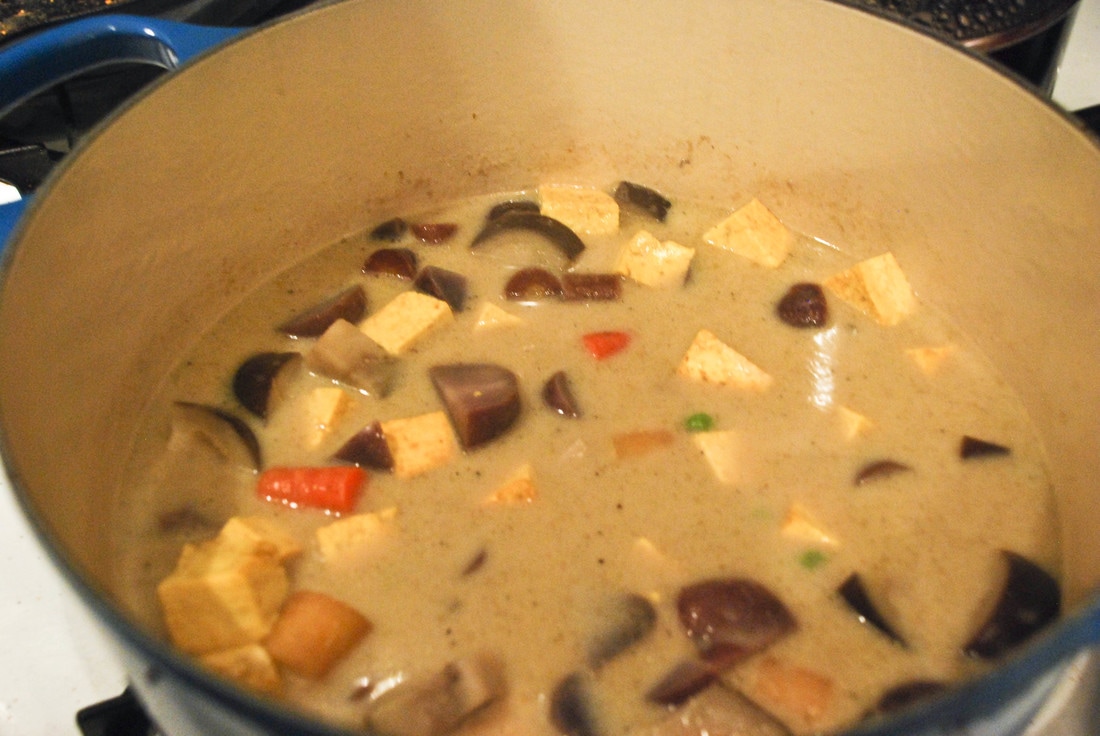
Like I mentioned, its a pretty simple recipe to make - heat the coconut milk, add in your curry paste, add more liquid and your chopped veggies, simmer until veggies are soft and the flavors have marinated! 

Let me know what you think! What's your favorite kind of curry? 
Ingredients:
1 Cup Uncooked Brown Rice
2 Cups Water
​
2 Tablespoons Green Curry Paste
2 Cans Coconut Milk
1 Cup Water
4 Carrots
1 Small Eggplant
1 Cup Green Peas
1 Package Tofu
1 Tablespoon Turmeric

Prep Time: 10 minutes
Cook Time: 30 minutes
Servings: 4-6
Instructions:

Combine the rice and water in a pan. Bring to a boil. Reduce to a simmer for 35-40 minutes or until the water is absorbed. 

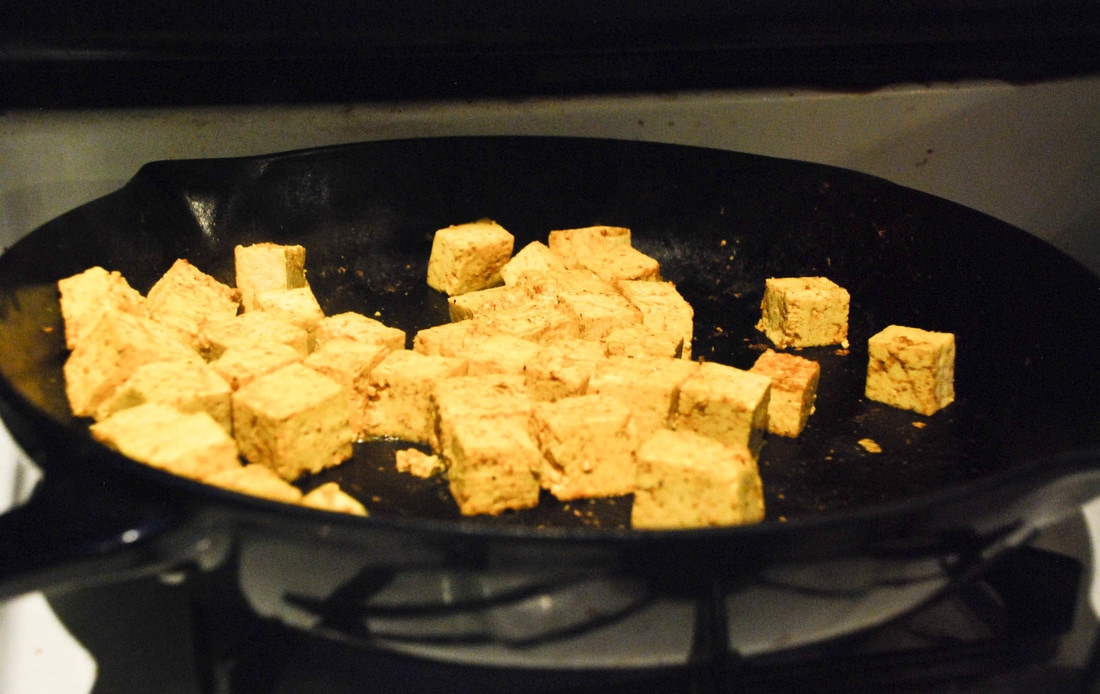
Chop all of the veggies and tofu into cubes. Press the excess water out of the tofu. Fry the tofu in a skillet or non-stick pan with turmeric until all sides are crispy. 

Open the two cans of coconut milk and scoop out the solid cream part at the top and put into a pan over medium heat. Stir until the cream has liquefied and begins to bubble. Add the curry paste and again stir to combine. 

Pour the remaining coconut milk into the pan. Add your veggies and tofu and one cup of water. You can add more water depending on how thick you like your curry broth. 

Cook until the veggies are soft and ready to eat. 

​Serve the rice and veggies in two separate bowls. As you are eating add the rice into the veggie bowl to soak up the broth and mix with the veggies - enjoy!
Picture
0 Comments

Stir Fry Veggies and Quinoa with Seared Tofu

4/6/2015

0 Comments

 
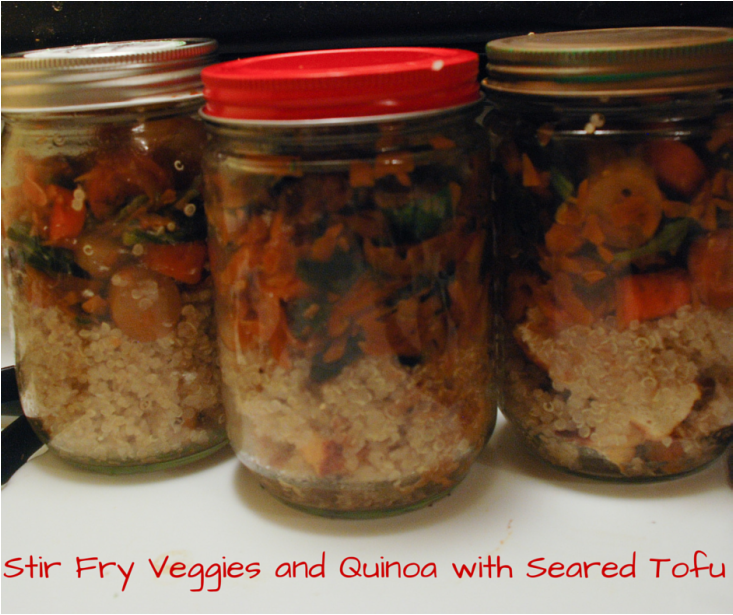
Stir Fry Veggies with Quinoa and Seared Tofu
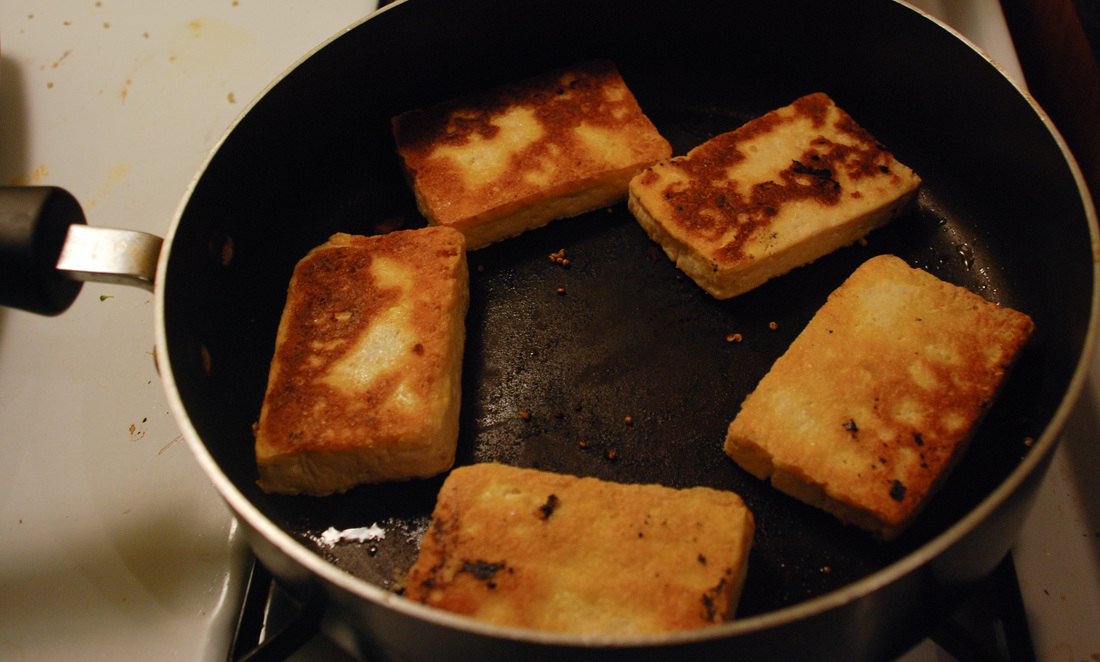
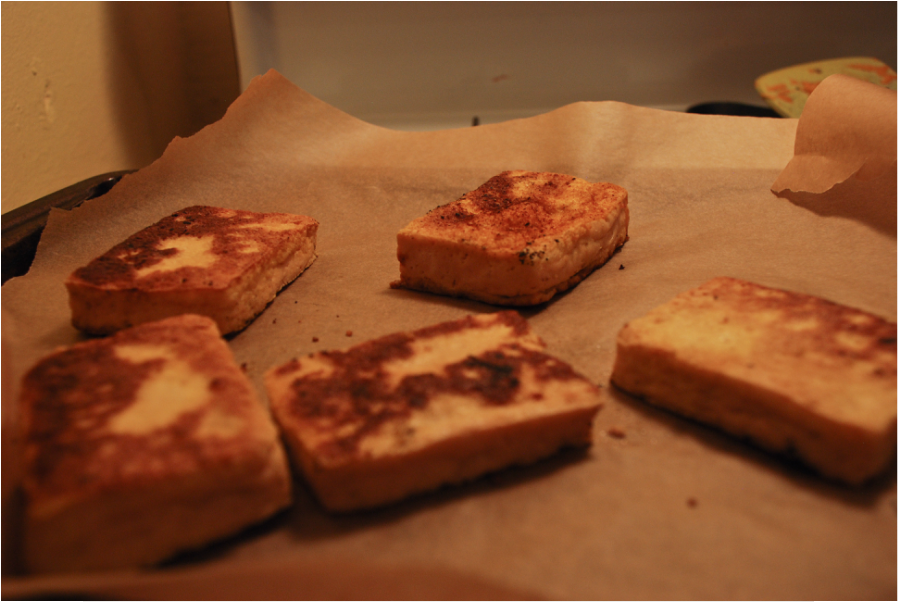
I had some of the best tofu ever when eating out the other day - the firmness and texture were amazing. It was hard to tell that I was eating tofu (they had even sliced the tofu on an angle so that it looked like chicken breast). I asked the waiter how it was prepared and he told me that the chef pressed, seared, and baked the tofu. I had to try to recreate it! It turned out great and was not difficult to make. If you have a cast iron skillet (or other oven-safe pan) you can use the same pan from the stove right into the oven and would probably be ideal.
Stir Fry Veggies with Quinoa and Seared Tofu
As I have all winter - I had some carrots on hand and some butternut squash that I had shredded and froze. I added some cooking greens and mushrooms. Feel free to use whatever vegetables you have on hand. Make sure to chop them to approximately the same size so that they all cook for the same amount of time.
Stir Fry Veggies with Quinoa and Seared Tofu
I made mine for lunch, so I divided everything into four portions to bring into work with me.
Ingredients:
I block tofu
2 cups cooked quinoa
4 Medium sized carrots
1 cup butternut squash
2 cups greens
1/4 cup mushrooms
Turmeric
Ginger
Sriracha (optional)
Prep Time: 15 minutes
Cook Time: 35 minutes
Servings: 4
Instructions:
Press your tofu for about 5 to 10 minutes. Slice in fours. Sear tofu for 5 minutes on each side on high heat with a little bit of water or oil. Sprinkle turmeric and ginger on each side. Cook in oven at 400 degrees for 20 minutes, flipping halfway.

While the tofu is cooking - chop and saute the vegetables with water over medium heat. Start with the carrots and squash. Once again, add a generous coating of turmeric and ginger and stir in to cover all the veggies. When they are soft add the greens and mushrooms and cook until the greens are wilted. I generally need to add the greens a little at a time and let them wilt down until I have room for some more.

Serve the veggies over quinoa and top with a slice of tofu. Top with sriracha, if desired. Enjoy!
0 Comments

Veggie Burger with Crispy Carrots on Tortilla

3/7/2015

0 Comments

 
Picture
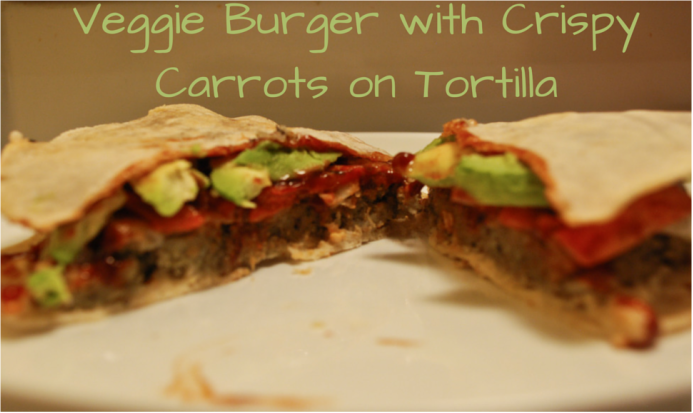
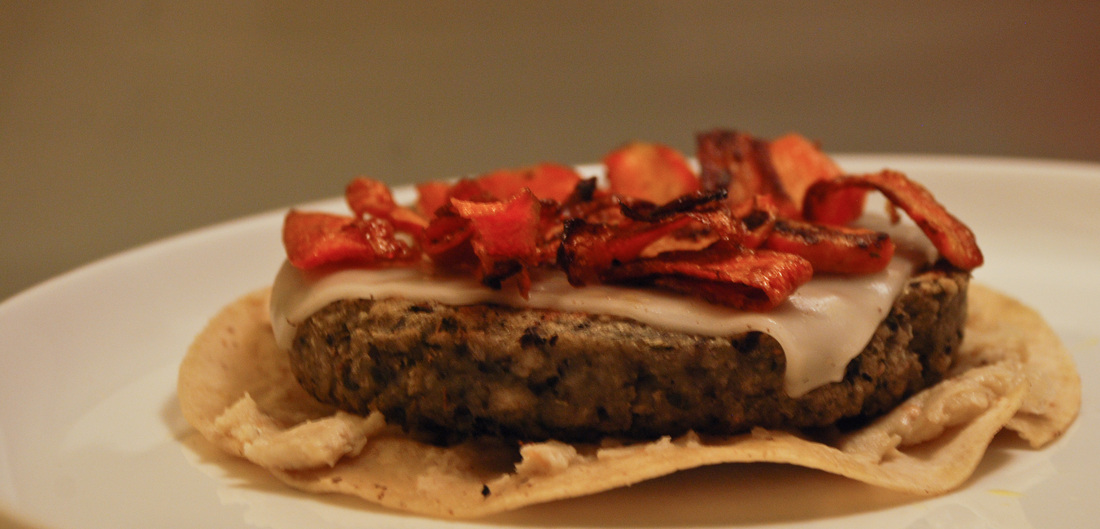
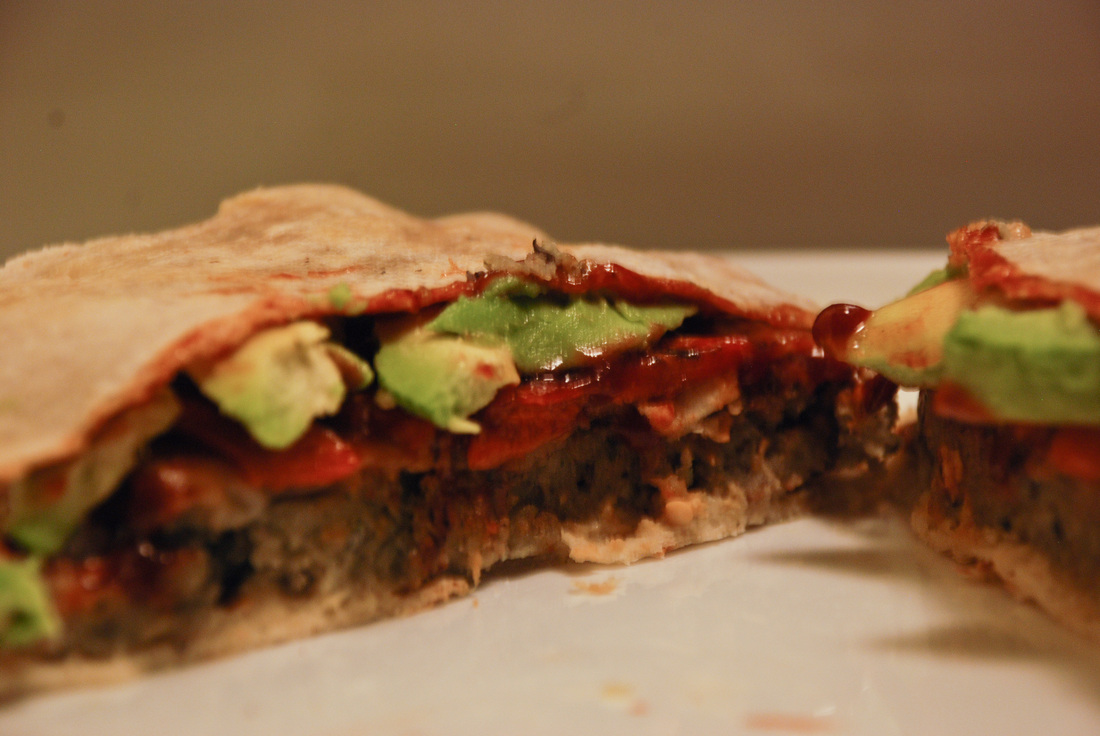
This is a story about making something out of nothing in your fridge (or freezer). Coming home after being out of town my fridge was basically bare. I had veggie burgers, but no buns. I had taco shells, but nothing to make tacos with. The only veggies I had were an avocado about to go bad and a carrot that was losing its crispness. Put it all together and what do you get? A veggie burger on tortillas! 
Picture
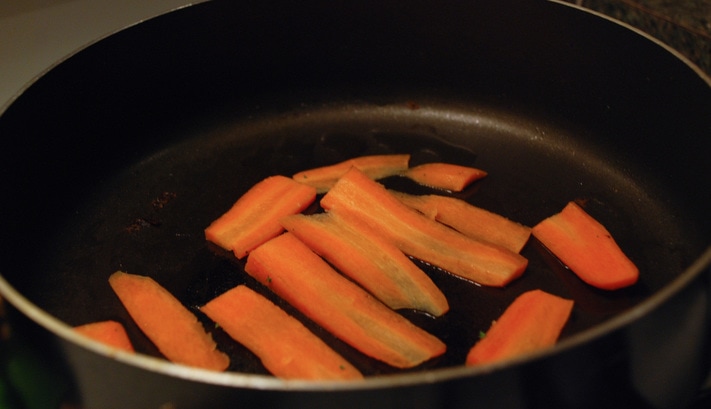
I sliced the carrot thinly and fried it up in some olive oil to compensate for the age of the carrot and add some crisp to the sandwich. I added some baba ganoush, vegan cheese I had on hand, and topped it with the avocado. It almost looks like it was planned! Just goes to show you that you can make a gourmet sandwich out of whatever you can find in your fridge, you just need to be creative!  
Picture
Ingredients:
2 Tortillas
1 Veggie Burger
1/2 Carrot
1 Avocado
1 Tablespoon Baba Ganoush
1 Slice of Vegan Cheese (optional)
Prep Time: 5 minutes
Cook Time: 5-10 minutes
Servings: 1
Instructions:
Heat a skillet over medium heat and add either a little bit of olive oil or water. Add the veggie burger to the pan and cook for about 5 minutes (if frozen) so that it has a nice crispy edge on the bottom. Flip it over and cook for another 5 minutes. If you are going to add a slice of vegan cheese, put it on about a minute before the burger is done.

Meanwhile, slice the carrot thinly either using a vegetable peeler, mandolin, or knife. Once the veggie burger is done, in a separate skillet over medium-high heat add the carrots to the skillet. They should need long on each side to get a nice crispiness.

Open and slice the avocado.

Ideally your burger and carrots are done around the same time. If one is done earlier then turn the heat to low and cover the skillet to keep it warm. Once both are done, remove the carrots from their skillet and add them on top of the burger. Place the tortillas on the open skillet for a couple seconds on each side, just to toast them a bit. Spread the baba ganoush over over one of the tortillas and top with the burger and carrots. Top with the avocado, any condiment you would like such as ketchup, BBQ sauce, or sriracha. Add the second tortilla on top. Serve and enjoy!
Picture
0 Comments

Baked Tofu with Quinoa and Veggies

2/21/2015

0 Comments

 
Baked Tofu and Veggies over Quinoa
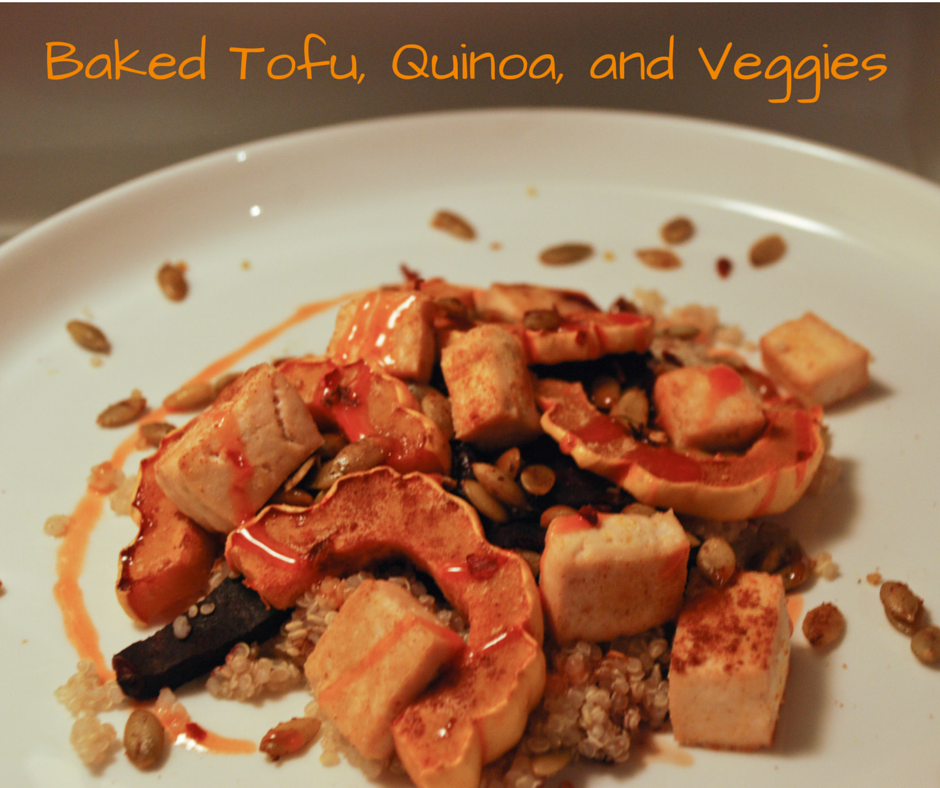
I make a lot of Asian stir fries with tofu, but I had a lot of local seasonal vegetables, so I wanted to put a different spin on things. I still used a lot of Asian flavors with ginger and sriracha, but I used some different cooking methods and ingredients.
I love roasting squash - it really brings out the flavors and adds a nice sweetness. In this recipe I used delicata squash, which I think is the easiest squash to cook with. It's generally smaller and has a softer skin so it's easier to cut open and you don't have to worry about peeling it. Since I was roasting the squash I thought I would try roasting the tofu as well. Many people don't like tofu because of the texture, but changing up the cooking method (as well as pressing the liquid out of it) has a big impact on the texture. Roasting or baking tofu makes it firmer and dryer and gets rid of the mushy texture that many people don't like about tofu.
Baked Tofu and Veggies over Quinoa
I hadn't had any quinoa in a while, so I decided to use quinoa instead of rice. I had purple carrots, so I sauteed those on those stove by themselves. First because I didn't have any more room in the oven, but also because I've learned that purple carrots turn everything else they're cooked with purple, so I needed to isolate them.
This dish has a lot of pieces cooked separately, but they all fit together well. There's a great mix of textures with the fluffy quinoa, soft squash, spongy tofu, and crunchy carrots and pepitas.
Ingredients:
1/2 Cup Dry Quinoa
1 Block Tofu
1/2 of a Small Delicata Squash
1 Cup Sliced Carrots
1/4 Cup Pepitas
1/2 teaspoon Turmeric
1/2 teaspoon Ginger
1/2 teaspoon Paprika
Sriracha
Prep Time: 15 minutes
Cook Time: 40 minutes
Servings: 4
Baked Tofu and Veggies over Quinoa
Instructions:
Preheat the oven to 400 degrees. 
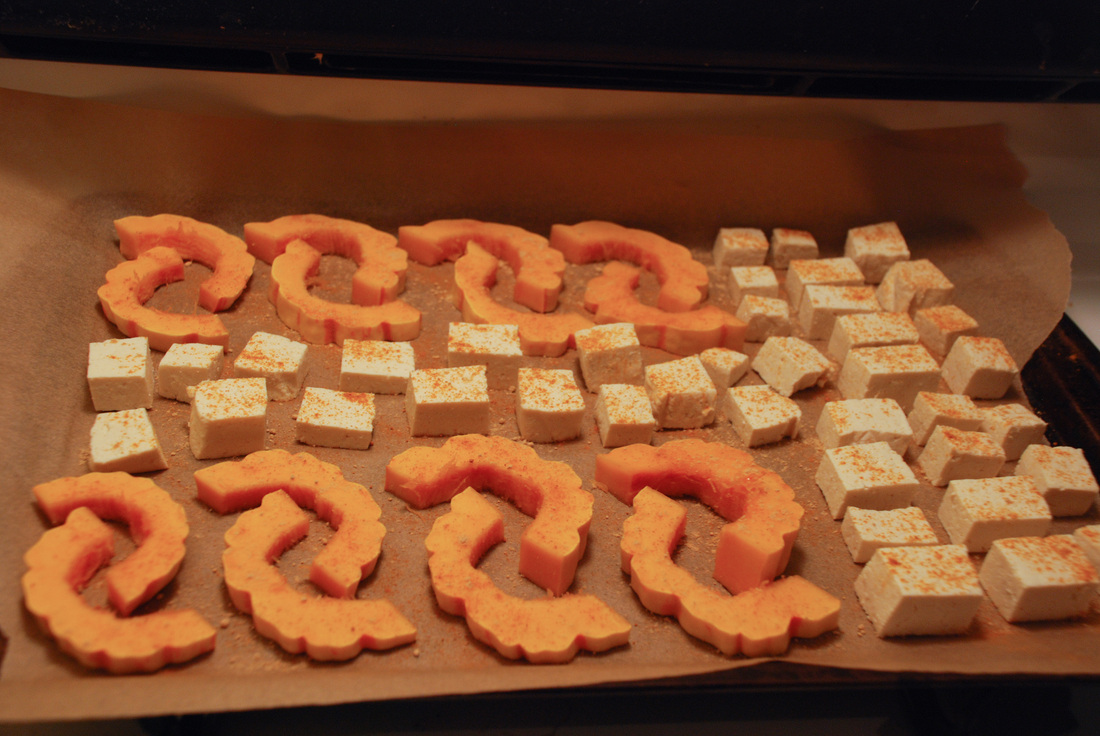
Slice cube and press your tofu. Slice the squash in half. Scoop out the seeds inside and slice into 1/4 inch thick slices. Place the tofu and squash on a parchment paper lined baking sheet, sprinkle with turmeric, ginger, and paprika and roast for about 20 minutes.
Meanwhile, prepare your quinoa. Add quinoa and 1 cup water to a sauce pan. Bring to a boil. Lower heat and simmer for about 20 minutes or until the water has evaporated. 
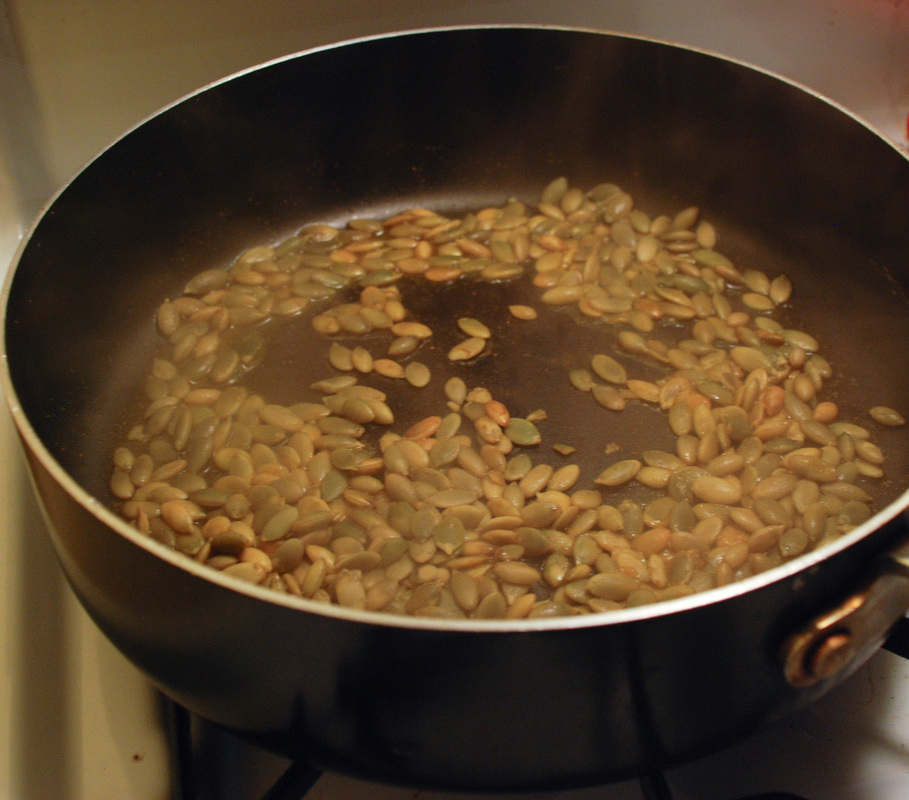
Slice carrots and saute on over medium heat for about ten minutes. Remove from the pan and add the pepitas, cooking for about 5 minutes.
All of your items should finish cooking around the same time. Divide the quinoa, tofu, squash and carrots evenly among four plates. Top with the pepitas and any sauce you would like - I used sriracha. Serve and enjoy!
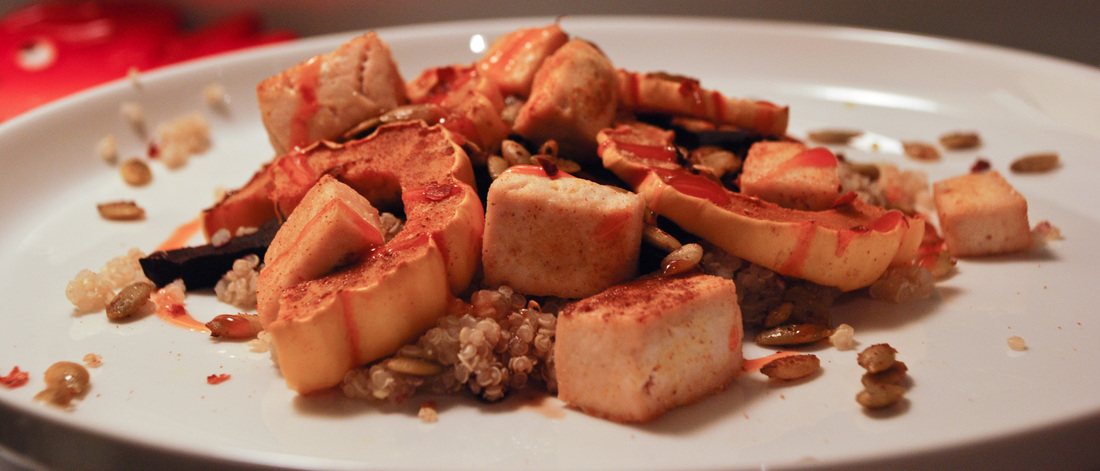
Baked Tofu and Veggies over Quinoa
0 Comments

Spicy BBQ Carrot Sticks with Tofu Ranch Dip

1/28/2015

0 Comments

 
Picture
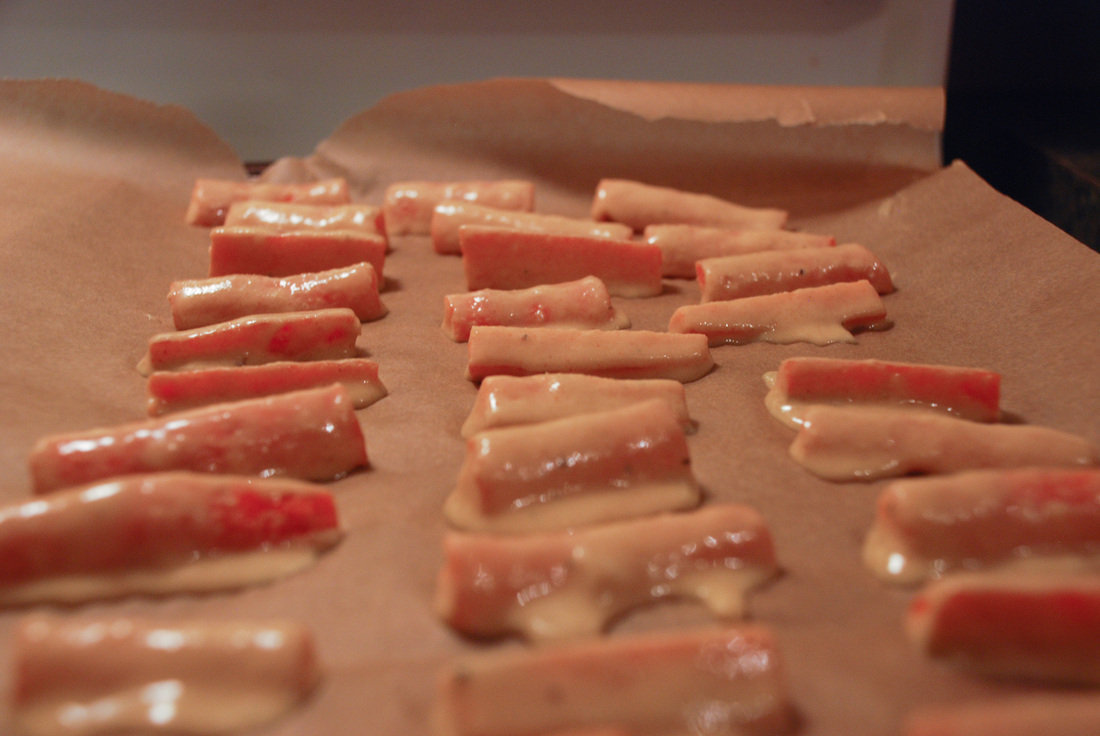
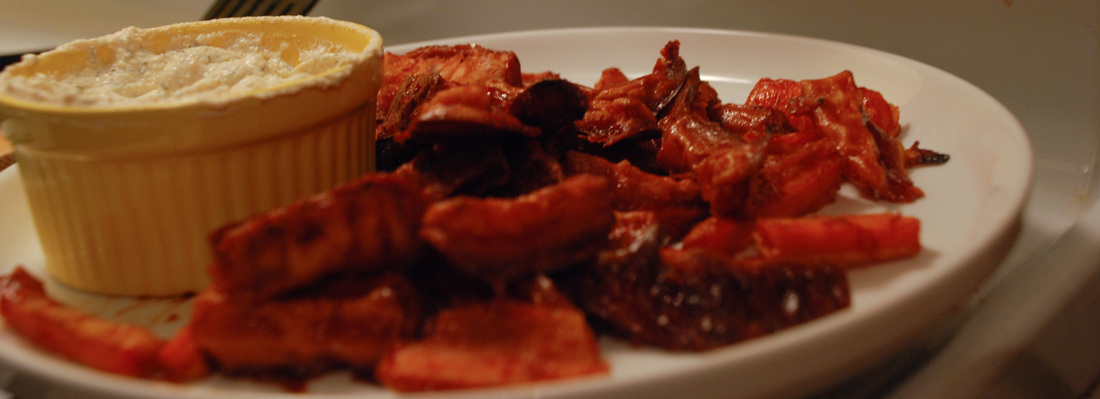
I mentioned in my post last week on the Spicy BBQ Chik'n Bites that I only ended up using about half of the batter and sauce I made, based off of Kristy Turner's Buffalo Cauliflower Wing Pizza. I wasn't sure how long it would last, so I wanted to use it up as quickly as possible. I've been getting a lot of carrots in my vegetable deliveries so I thought this would be a new fun way to use them up - kinda like breaded zucchini sticks. They were a big hit and super simple to make!
Picture
I was a little nervous as to how they would turn out since I've never had anything like them, but they were great and Jay loved them - here are a couple of his best quotes:
  • "Wow, these are amazing!"
  • "These are the best carrots ever!"
Individually, the carrot stick is spicier than one of the bites I made since they don't have the extra breading or the tofu baked in. They turn out a little bit soft, but still sturdy. These are a great healthy way to add some vegetables to your normal snacking routine, plus you can dip them as much as you want! The tofu dipping sauce is naturally low in fat and calories but high in protein and calcium. I love guilt free snacking!
Picture
Ingredients:
About 5 Carrots
1/2 Batter Recipe
1/2 Spicy BBQ Sauce Recipe

Tofu Ranch Dipping Sauce:
1/2 Block Tofu
3 teaspoons Apple Cider Vinegar or Lemon Juice
1 Tablespoon dried Dill
1 teaspoon Onion Powder
1 teaspoon Garlic Powder

Prep Time:
15 minutes

Cook Time: 30 minutes

Servings: About 40 carrot sticks
Instructions:
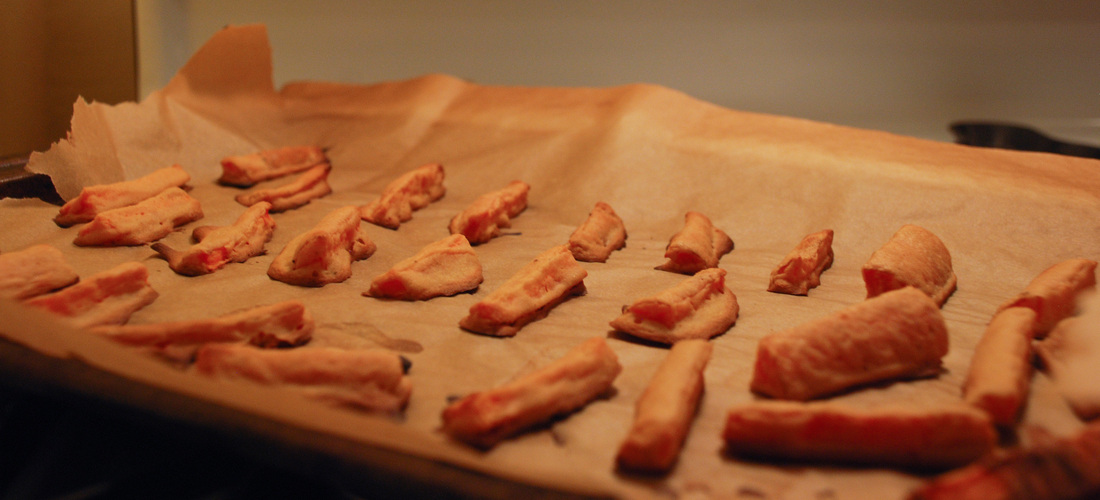
Preheat oven to 450 degrees. Slice carrots in half and then into quarters so that you get 8 sticks out of each carrot. Dip the carrot sticks in the batter and then place on a parchment paper lined cookie sheet. Bake for 20 minutes.

Once cooled to the touch, dip the carrot sticks in the Spicy BBQ Sauce and then place back on the parchment lined cookie sheet. Cook for another 5-8 minutes.

While the carrots are cooking, make the ranch dipping sauce. Combine all the ingredients in a food processor and blend until smooth. The proportions I used make a thick dip, so if you want it creamier, add more liquid.

Serve and Enjoy!
Picture
0 Comments

Chik'n and Veggie Macaroni and Cheese

1/19/2015

0 Comments

 
Picture
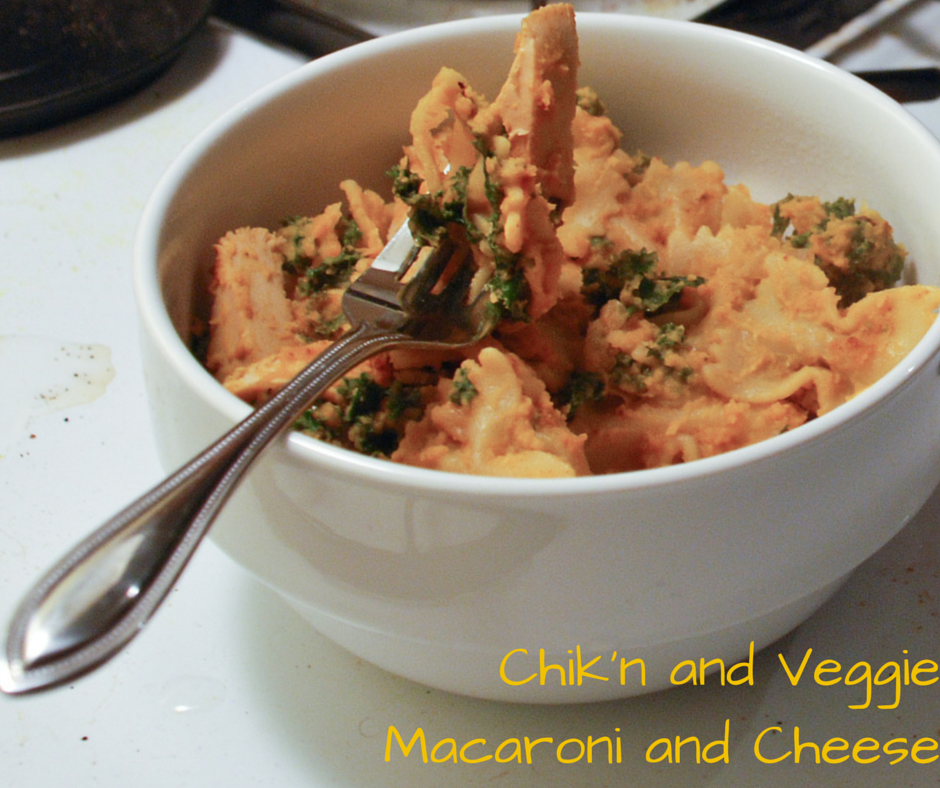
Yesterday I posted about Chik'n Alfredo Pizza and mentioned how the sauce that I made was double what I needed. I used the rest of the sauce to make this recipe. It was one of those nights where I needed to make something quick and just threw together what I had. That being said, the vegetables I used are totally interchangeable.

I'd just opened the Beyond Meat chicken so I wanted to keep on using it in case it went bad faster once it was open. It was a nice change of pace to the pasta dishes I've been eating recently and reminded me of the chicken and pasta stir fries that dominated so many of my dinners growing up. I've been really impressed at how long this one package of chicken is lasting. According to the package one serving is 6 strips, but I've only been using 6 strips per recipe, which makes it a much more economical option.

As you'll see below, it comes together really quickly. The timing really depends on what kind of vegetables you use and how soft you want them to be. The veggies and pasta cook at the same time, then you add the pasta and sauce to the veggies just to let the sauce heat up, and voila! You'll notice there aren't a lot of spices you add to this dish, because the sauce has so much flavor in it.
Picture
Ingredients:
1/2 Butternut Squash Cheese Sauce Recipe
1/3 Box of Bow Tie (or your favorite) Pasta
6 Strips of Beyond Meat chicken, sliced in thirds
1 Cup Kale
1/2 Cup Sliced Carrots
1/2 Cup Diced Onion
Prep Time: 10 minutes

Cook Time: 10 minutes

Servings: 2 servings
Instructions:

Cook carrot and onions in a pan with a little bit of water until the carrots have softened a bit. You don't need to add any seasonings because the sauce is so flavorful.

Meanwhile cook the pasta according to the package directions. You'll want it a little al dente because the pasta will cook more with the veggies.

Chop up the kale and add it to the pan once the carrots and onions are just about done. Add the pasta and sauce to the pan with the veggies and stir all together. Cook until everything is warmed.


0 Comments

Veggie Pot Pie with Cashew Filling

1/7/2015

0 Comments

 
Picture
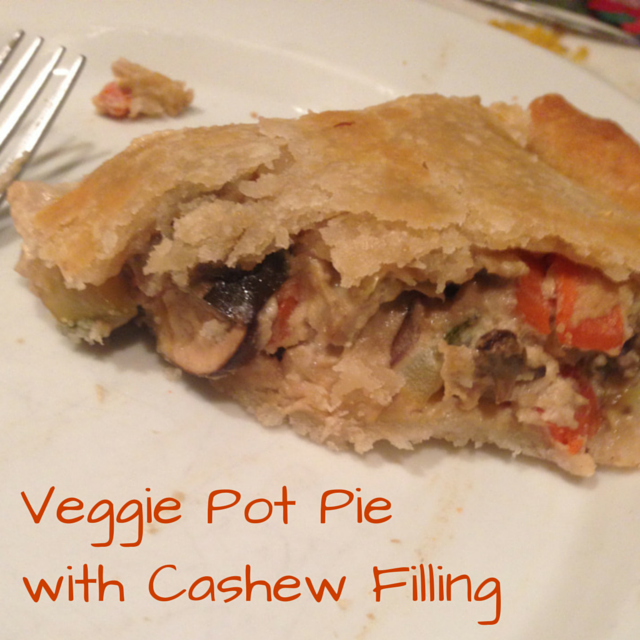
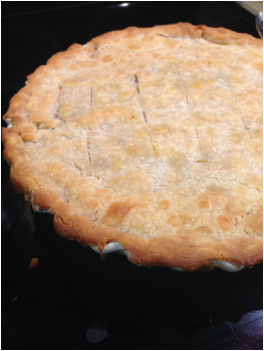
I made this recipe for Christmas this year. It is inspired by aveggie pot pie with cashew filling by Kathy Patalsky at Healthy Happy Life. Similar to the Brussel Sprout Casserole I made for Thanksgiving, I wanted to make something that had vegetables and grains/protein all in one since I wouldn't be able to eat much else that was served. This definitely did the job of filling me up! The cashew sauce is so rich and filling!
Picture
Picture
As you'll see in the instructions below, this comes together super quickly! Jay has mentioned before at how he likes pot pie and I had thought about making it for a while, but the word "pie" always turned me off. For some reason I have always thought of pies have difficult things to make. It definitely helped that I didn't make the pie crust on my own. I am not skilled enough for that and I didn't feel like experimenting on Christmas morning.

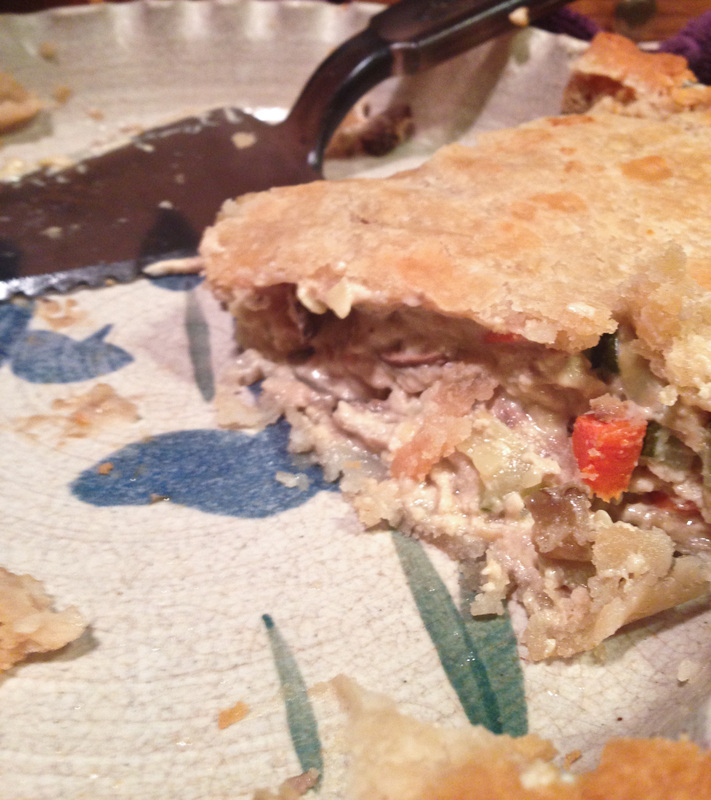
This dish was a huge it at Christmas! As you can see from the picture at the bottom of this post - there wasn't much left! I took that picture before I grabbed my second slice. There was just enough for me to have one slice for leftovers on Friday. I can't wait to make this for Jay and see what he thinks of it! It will be a great staple to have over the winter.
Ingredients:
Pie Crust
12 oz Mushroom
1 Zucchini
1 Squash
3 Carrots
1 Small Eggplant
1 Cup Vegetable Broth
2 Cups Soaked Cashews
1 Tablespoon Apple Cider Vinegar
Prep Time: 20 Minutes
Cook Time:
Servings: 12
Picture
Instructions:

Preheat your oven to 350 degrees.

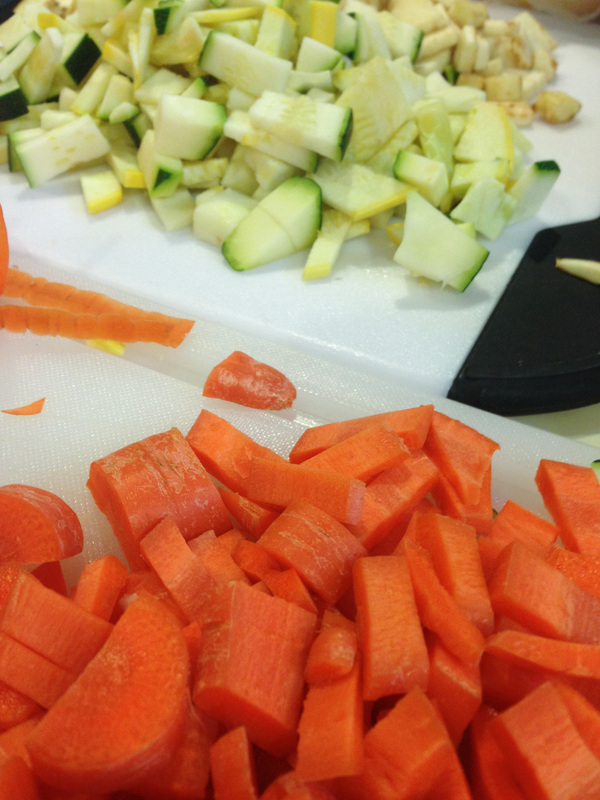
Chop all your vegetables. Measure how much you'll need by putting them in your pie dish. I used the leftover that I had from making the Spiral Veggie Tart the day before. Transfer your veggies to a large bowl.

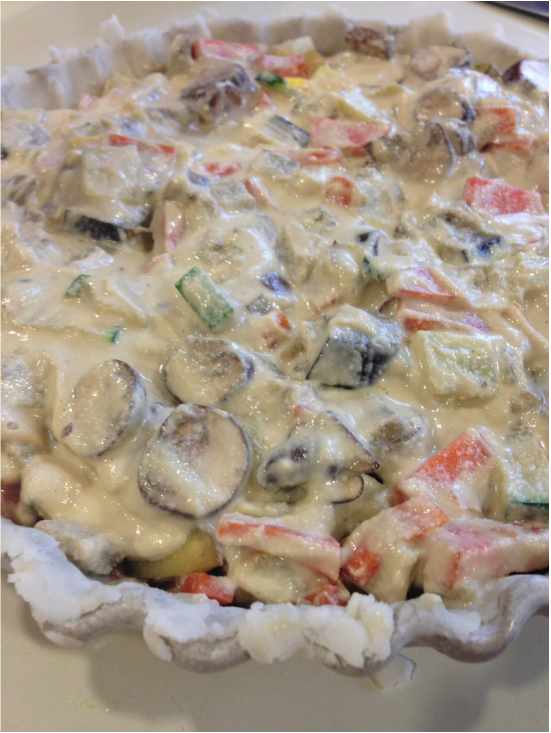
Drain the cashews. Add the cashews, vegetable broth, and apple cider vinegar in a food processor or blender and blend until smooth. Pour over your bowl of veggies and mix until the veggies are all coated. Depending on what size of a pie you are making you may not need all the cashew sauce. If you filled your pie pan full of veggies then you just want enough to coat the veggies and fill in the space between them. They shouldn't be swimming.

Roll out the bottom layer of your pie crust so that its about an inch wider (or the height of your sides) than the pie pan all the way around. Add the veggies and cashew mix to the pie pan. Roll out the top layer the same way and place it on top. Squeeze the top and bottom layers together around the edge. Slice 3-4 vents in the top of the pie crust.

Bake for 40 minutes or until the crust is golden brown. Serve and enjoy!
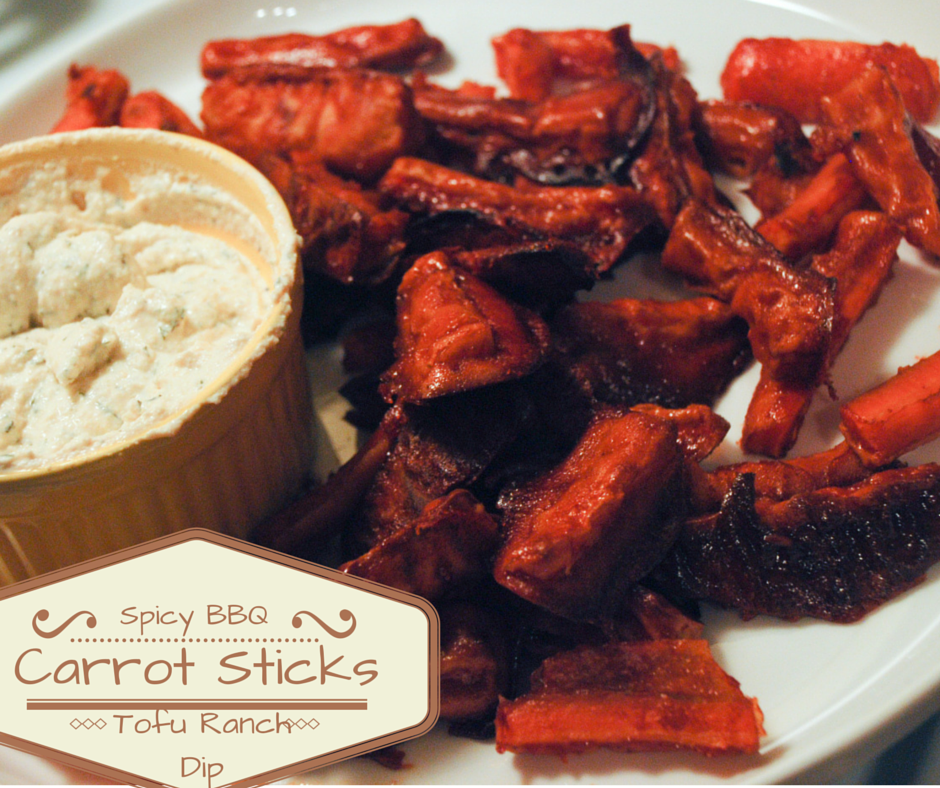
Picture
0 Comments

Spiral Veggie Tart with Sweet Potato Crust

1/4/2015

2 Comments

 
Picture
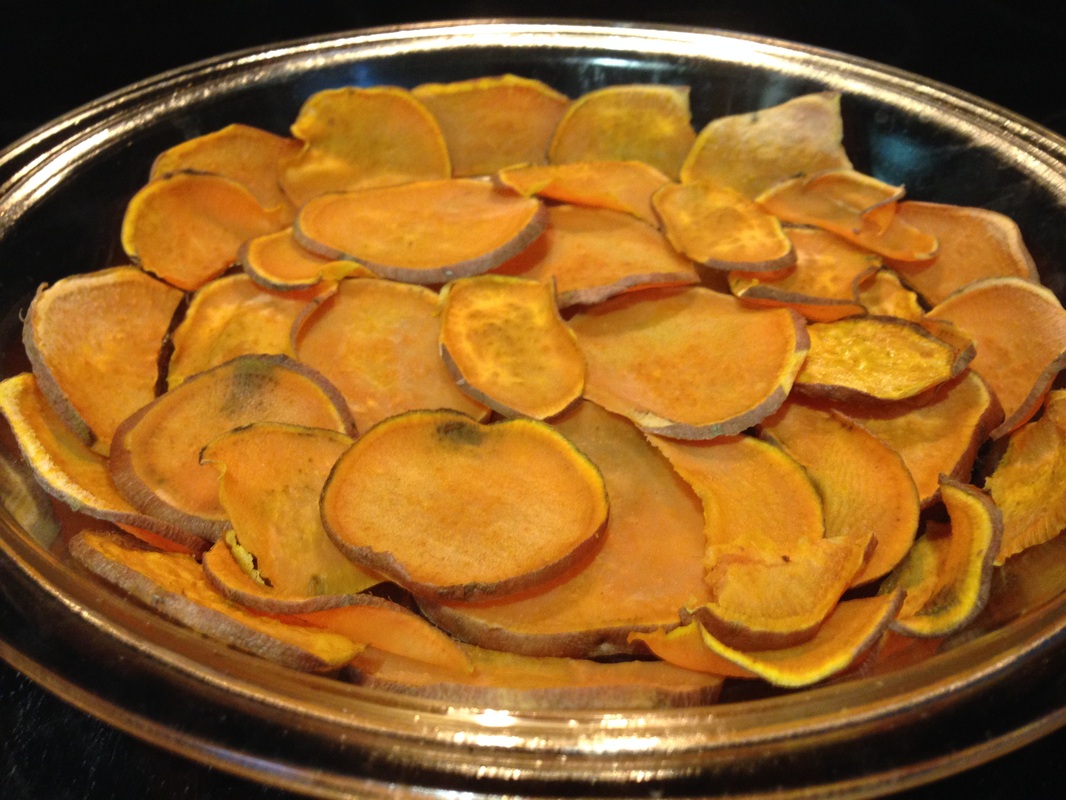
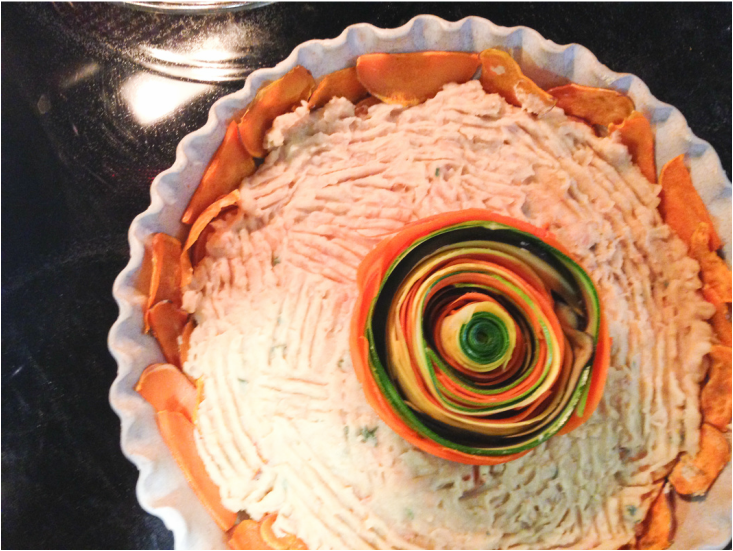
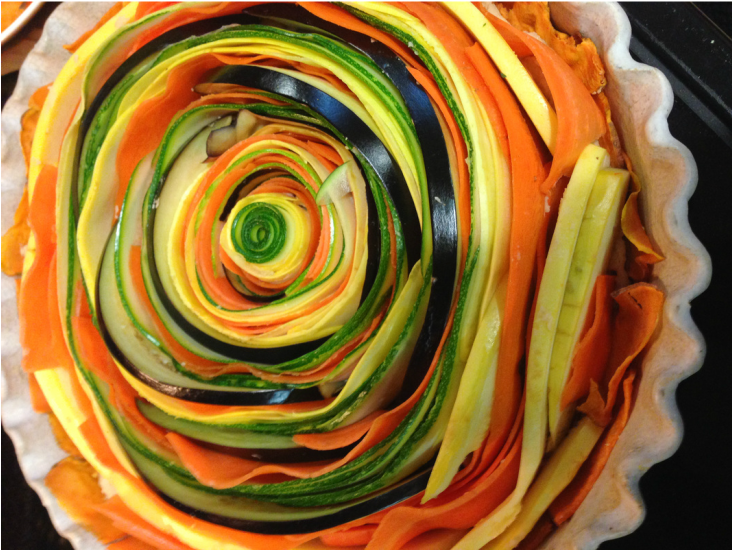
I made this dish as a side for our feast on Christmas Eve. I combined two recipes that I found on Pinterest. I saw this vegetable tart on Pinterest and thought it was so cool (check out the video on how they made it). My mom thought the same and decided it would look great on a buffet line! That recipe used pie crust and creme fraiche, so I needed to make it gluten free and vegan so that my brother and I could eat it. I had pinned this quiche with sweet potato crust recipe to try the crust sometime and thought it would work great for this. I decided to replace the creme fraiche with a white bean mixture. I'd used white beans as a tart base years ago. Their neutral nature lends them perfectly to this. You can add in whatever seasonings you'd like so the dish doesn't taste like beans and their moisture keeps the dish from drying out and binds the vegetables to the crust.
Picture
Picture
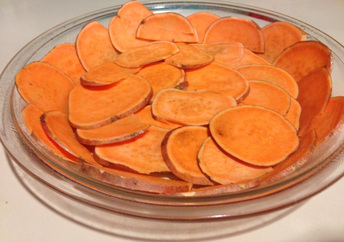
Make sure your potato isn't sliced too thin and there's a lot of overlap in your crust. It will look like your crust is too think, but the potato slices will shrink during cooking.

My mom was right. This is a great dish to put on a buffet. It's very impressive and looks much more difficult to make than it actually is. I had to be the first one to cut into it because no one wanted to disrupt how great it looked. While it may not have been difficult, it definitely was time consuming, especially because my mom and I did not have the same expectation of how much we were making. I was already to go with two 9 inch pie sheets and she came in and switched them out for 2 13 inch quiche pans.

I made the recipe for one 9 inch pan, since that is a more typical serving size, and much more manageable. It's also helpful if you have someone slicing the vegetables while you arrange them in the pie pan. Thanks Mom!
Ingredients:

3 Medium Sweet Potatoes

3 Zuchinni
3 Squash
5 Large Carrots
1 Large-Medium Eggplant

1 15oz Can White Beans
2 Tablespoons Lemon Juice
2 Tablespoons Non-Dairy Milk (I used Almond)
2 Tablespoons Nutritional Yeast (optional)

2 Cloves Garlic
2 Tablespoons Balsamic Vinegar
Picture
Prep Time: 20 minutes
Cook Time: 55 minutes
Servings: 6 as a side
Instructions:
Preheat oven to 400 degrees. Slice sweet potatoes and arrange in a crust-like fashion in a 9 inch pie pan. You don't want your slices to be paper thin and a make sure that there is significant overlap among the slices. It will look like the crust is too thick, but the potatoes will cook down significantly. Spray the potatoes with cooking spray and put in the oven for 15 minutes.

If you end up with gaps in your crust you can cook some more potatoes on a cookie sheet and add them in. They will not need to cook for the full 15 minutes.

While your crust is cooking, prepare the base of the filling. Drain and rinse the white beans. Place them in a bowl and mash them with a fork. Add the lemon juice, milk, and nutritional yeast and mix until well combined.

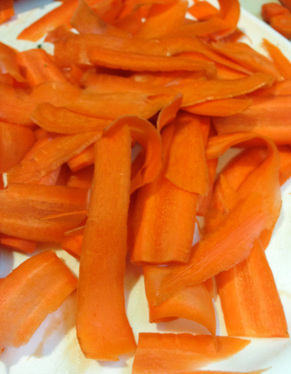
Slice your vegetables using either a vegetable peeler or a mandolin. You can use a knife you you want, but that would take some great skills. You want the vegetable slices to be paper thin so that you roll them up. If you have some slices that are thicker you can use them on the outer edges that don't need to bend as much. Make sure that you get the skin on at least one edge of the slice.

Once the crust has cooled to the touch, fill in any cracks as necessary. Spread the white bean mixture over the crust. It will be thick, so place dollops of it throughout the crust and spread lightly with a fork. You may need to hold down some of the potato slices so they don't move.
Picture
Take a vegetable slice and roll it up in a spiral. Place it in the middle of your pie pan. Continue to wrap vegetable slices around the center in an alternating fashion until you finish the pan. You'll have to do a couple rows of the same thing in order to build up the color. Alternate the dark zucchini and eggplant with the lighter carrot and squash. Try to end with something other than the carrot so that there is separation from the orange crust.

Mince the garlic and sprinkle it over the top of the pan. Lightly pour the balsamic vinegar over the top.

Lower the oven temperature to 375 and put the tart in for 40 minutes. The tart is down when the skins of the vegetable slices have soften enough that you can cut through them.

Serve and Enjoy!
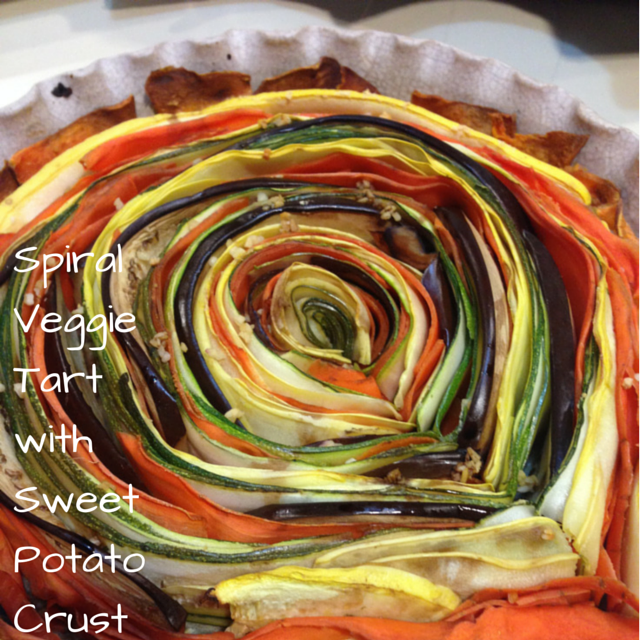
Picture
2 Comments

Cashew Chik'n and Vegetable Stir Fry

12/14/2014

0 Comments

 
Picture
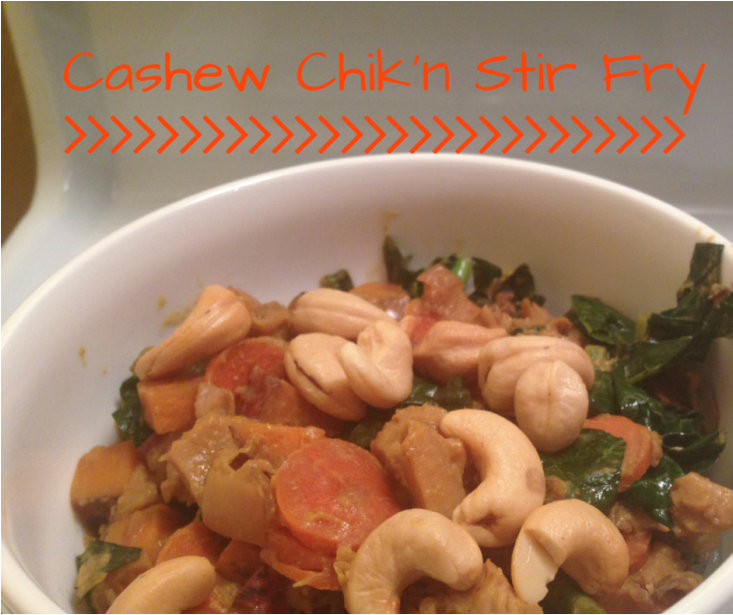
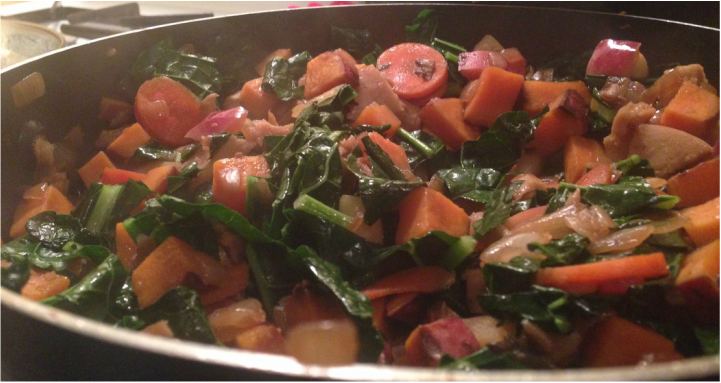
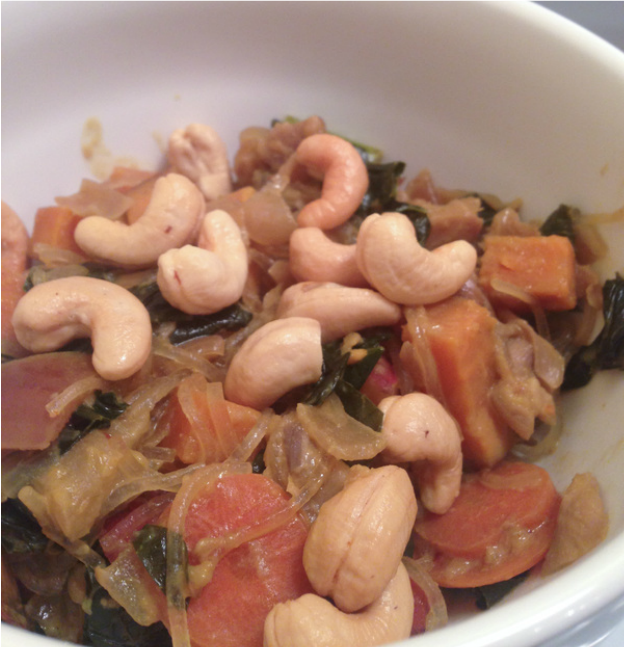
Jay had been saying how he wanted something with peanut sauce after I made the spaghetti squash with peanut sauce the other day. I thought that I would mix it up a bit and use tahini to make a sesame sauce. I wanted a recipe that would use my winter vegetables and all the cooking greens that I had and I thought a stir fry would be great.

I used bean starch noodles, also referred to as cellophane or glass noodles. There are other varieties made with potatoes or starches. You can find them in the Asian food aisle at the grocery store. They are normally packaged in three bundles of dried noodles. I normally use one bundle at a time. The package says it has three servings, but once you add in vegetables that one serving goes a long way. Jay has always been creeped out by them and this time was no different. If you don't like glass noodles you can use any other type of Asian noodle.
Picture
I used the rest of the seitan from the stew I made last week, about a half a cup. Jay thought it did a good job of filling in for chicken and was pleasantly surprised by the texture.
Picture
Ingredients:
1 bundle bean starch (or other Asian) noodles
1 carrot
1 medium sweet potato
4 oz mushrooms
1 small onion
1 clove garlic
1 apple

1 bunch cooking greens (kale, chard, mustard greens, collards, etc.)
2 tablespoons soy sauce
2 tablespoons apple cider vinegar

Sauce:
2 tablespoons tahini
1 tablespoon soy sauce
1 tablespoons apple cider vinegar
1 teaspoon lime juice
2 teaspoons ginger
1/2 teaspoon sambaal oleek or sriracha or red pepper flakes (optional)
Prep Time: 10 minutes
Cook Time: 30 minutes
Servings: 4
Instructions:

Cook the noodles to package directions.

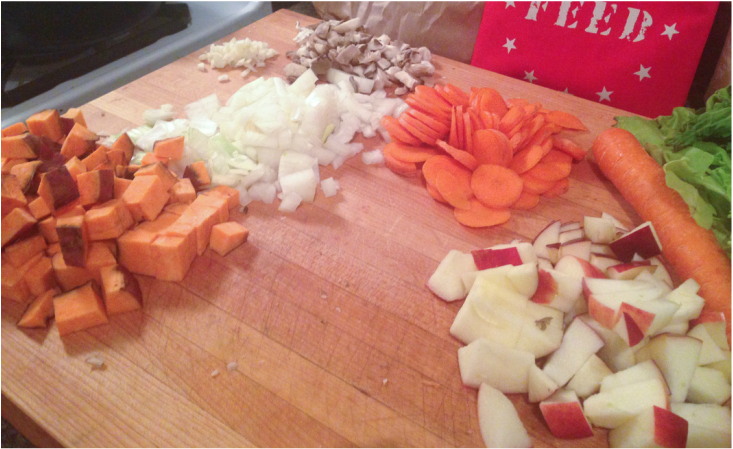
While the noodles are cooking, chop up all your vegetables in the order you'll cook them - garlic, onion, carrot, sweet potato, apple, mushrooms, greens. I like to start cooking the heavier vegetables while I chop the rest. Heat the garlic and onion over medium heat until the onions begin to turn translucent. Add the carrots and sweet potato and cook for about 5 minutes, then add the apples, mushrooms, and seitan. Finally, add the greens and let them wilt.

To make the sauce combine all the ingredients in a bowl and whisk them together. This makes enough sauce for a light coating, so if you want more you can increase the portion size of each ingredient. Pour the sauce over the vegetables and stir to evenly coat the dish.

I generally find that cellophane noodles tend to be very long, so after I drain them I like to put the whole pile on my cutting board and slice them once or twice. Combine the vegetables with the noddles. Serve and top with cashews. Enjoy!
Picture
0 Comments
<<Previous

    Author

    This blog is about my adventures adhering to a plant-based diet in a meat-based world and incorporating vegan practices into more parts of my life. As many of my friends and family aren't vegan, and the best part of cooking is sharing your food with others, I try to make recipes that can be enjoyed by vegans and meat-eaters alike. 

    Picture

    Categories

    All
    Acorn Squash
    Appetizers
    Apples
    Asian Inspired
    Avocado
    Banana
    Basil
    Beans
    Beets
    Bell Pepper
    Beyond Meat
    Blueberry
    Boston
    Breakfast
    Broccoli
    Brussel Sprouts
    Butternut Squash
    Cambridge
    Carrots
    Cashews
    Cauliflower
    Cheese Sauce
    Cooking Greens
    Corn
    Cranberry
    Delicata Squash
    Dessert
    Edamame
    Eggplant
    Gluten Free
    Grains
    Green Beans
    Ice Cream
    JayApproved
    Kale
    Leeks
    Macaroni
    Mushrooms
    Noodles
    Nut Free
    Onion
    Orange
    Pasta
    Peanut Butter
    Peanuts
    Pear
    Peas
    Pesto
    Pie
    Pittsburgh
    Pizza
    Potato
    Quinoa
    Restaurants
    Rice
    Sandwich
    Seitan
    Sides
    Slow Cooker
    Something GUD
    Sour Cream
    Soy Free
    Spaghetti Squash
    Spinach
    Stew
    Summer Squash
    Sun Dried Tomaotes
    Sweet Potato
    Tacos
    Tahini
    Tempeh
    Thanksgiving
    Tofu
    Tomato
    Veggie Burger
    Zucchini

    Archives

    March 2017
    February 2017
    January 2017
    July 2015
    June 2015
    May 2015
    April 2015
    March 2015
    February 2015
    January 2015
    December 2014
    November 2014

    RSS Feed

Powered by Create your own unique website with customizable templates.