Connect with me!
Vegetable Way
  • Blog
  • About
  • Recipe Index
  • Restaurant Reviews

Veggie BBQ Pizza

3/15/2017

0 Comments

 
Picture
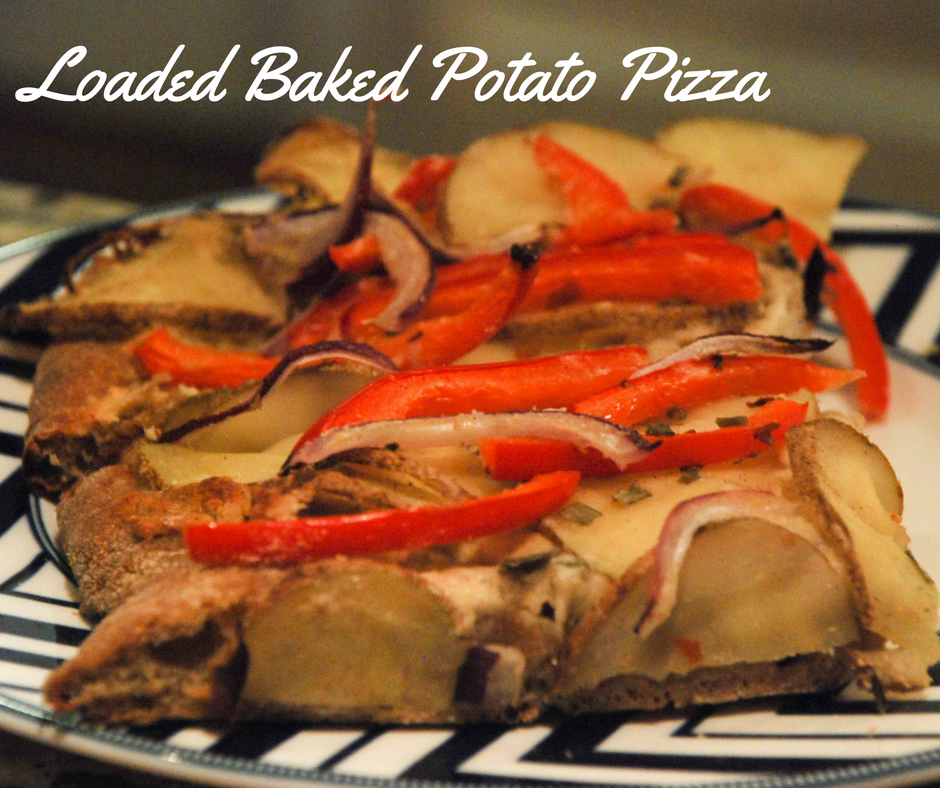
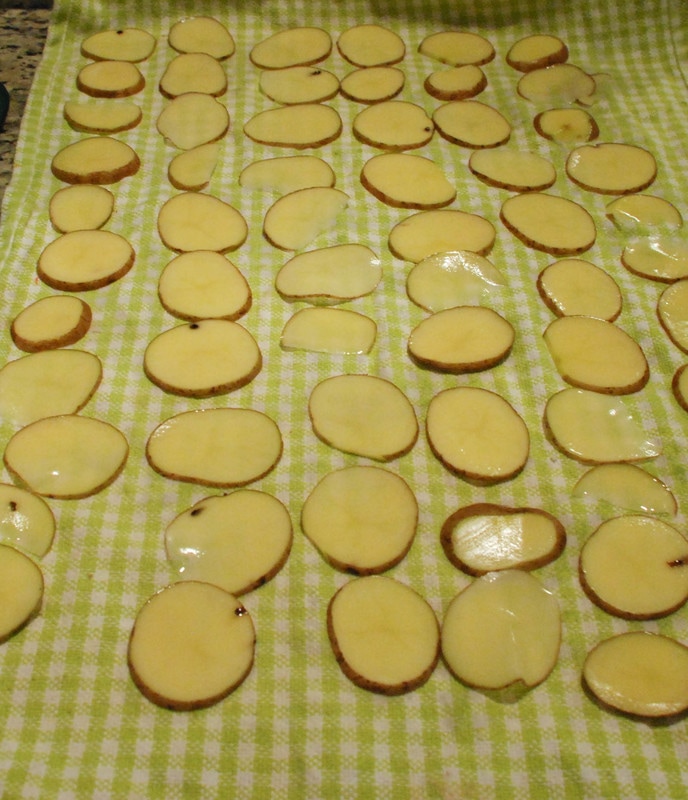
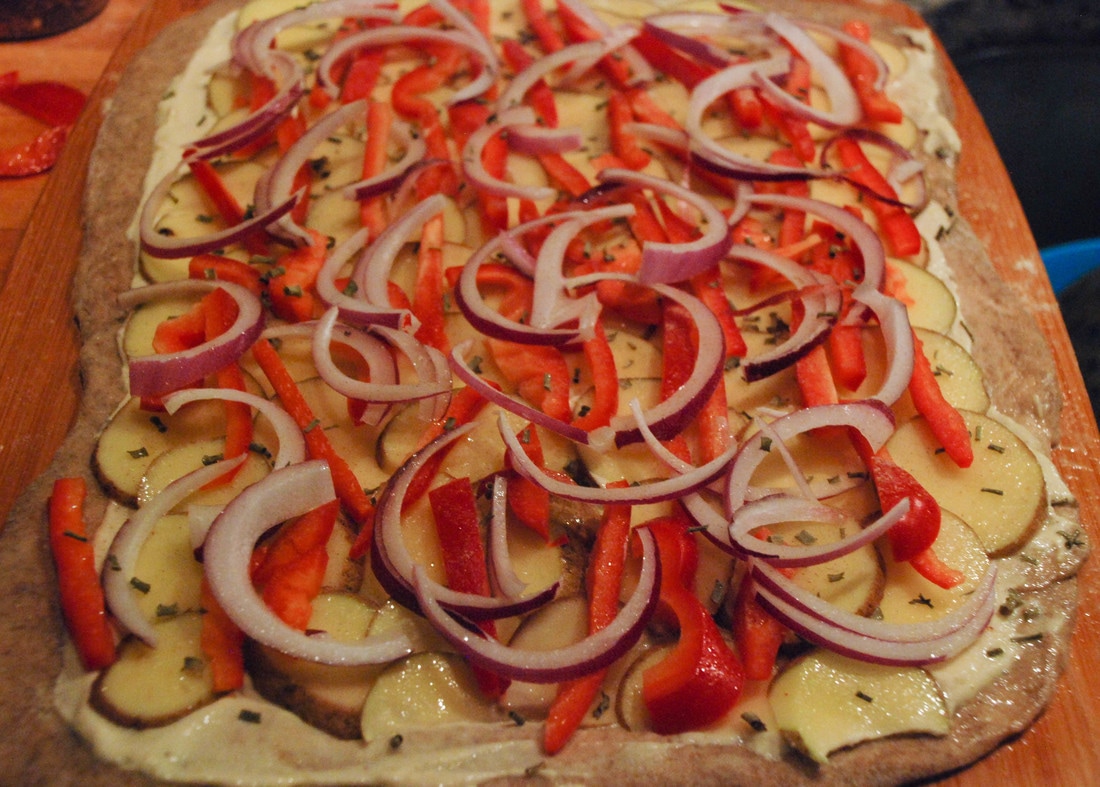
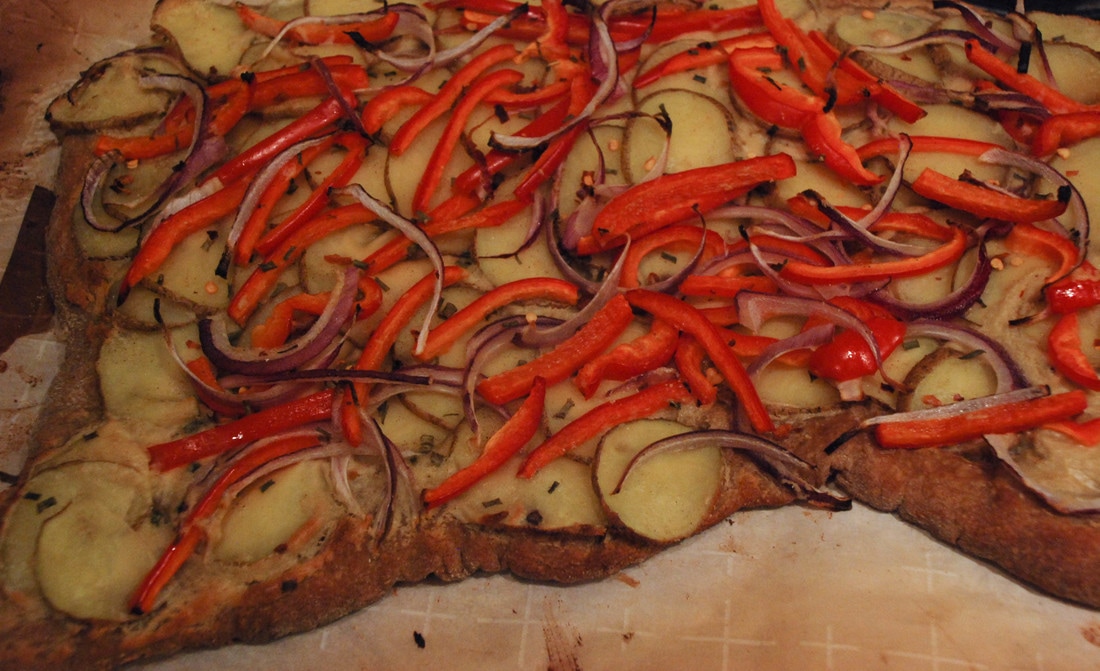
I recently found this premade whole wheat pizza crust, which is great when you need to whip something up quickly! You can keep them in the freezer and since their already rolled out and thin, they defrost quickly, as opposed to a ball of uncooked dough. 
Picture
Picture
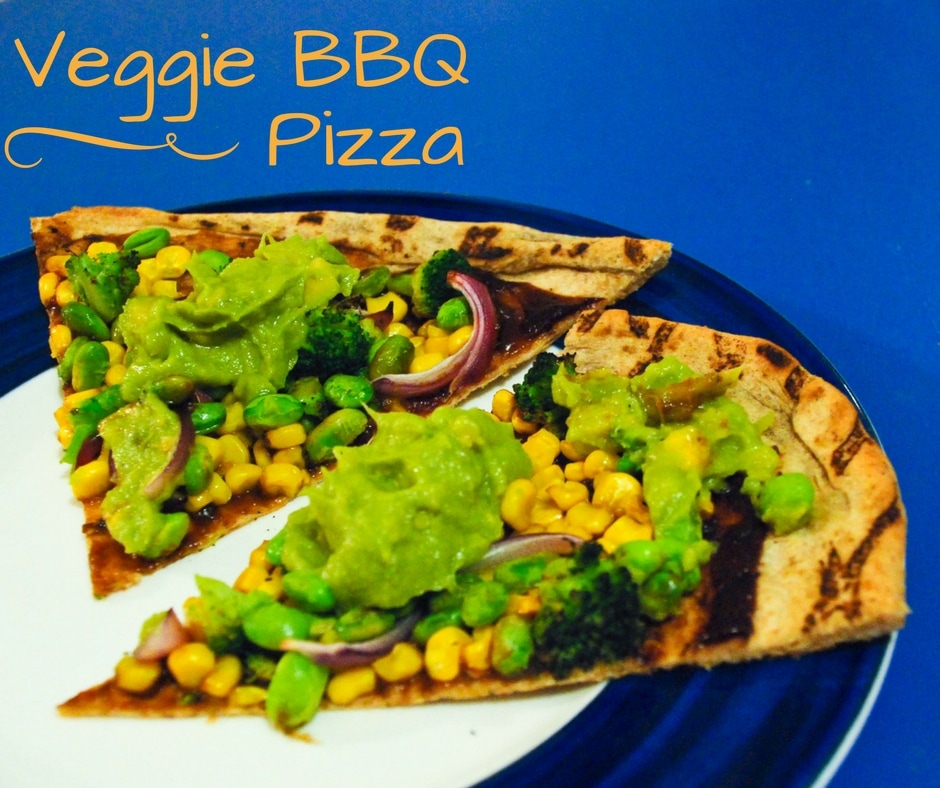
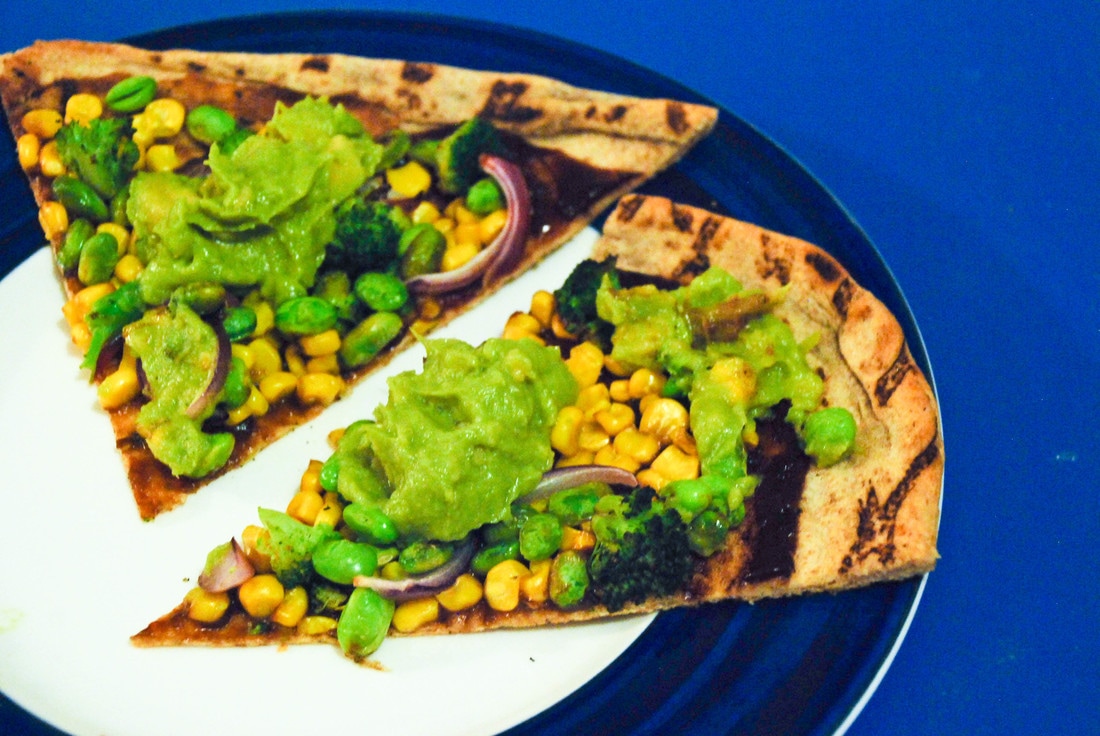
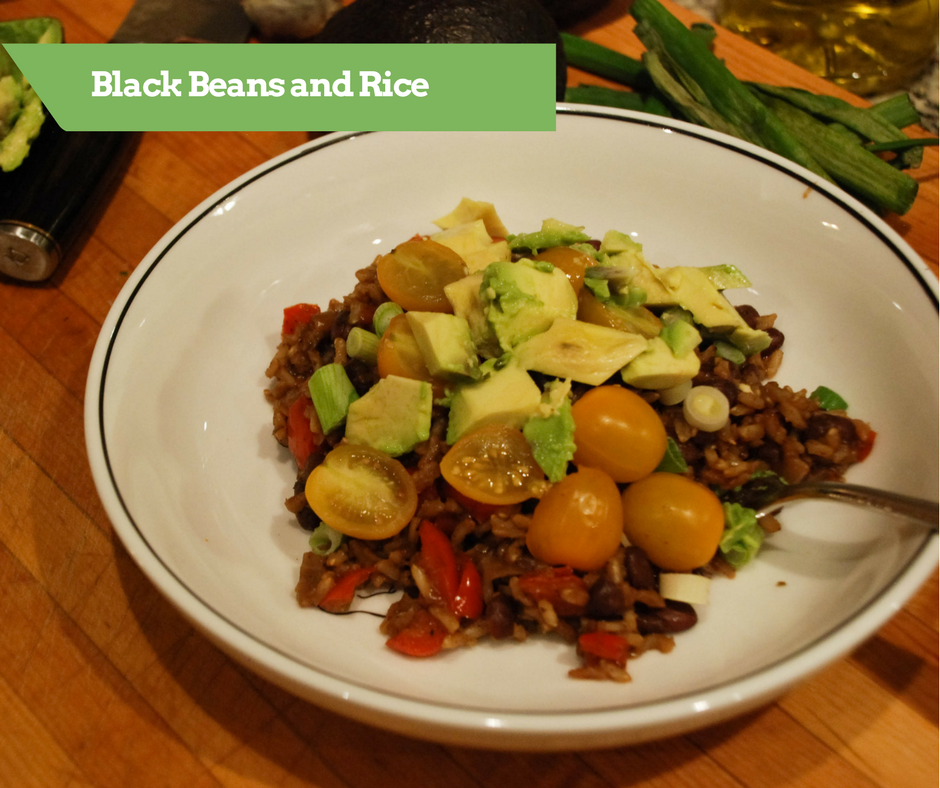
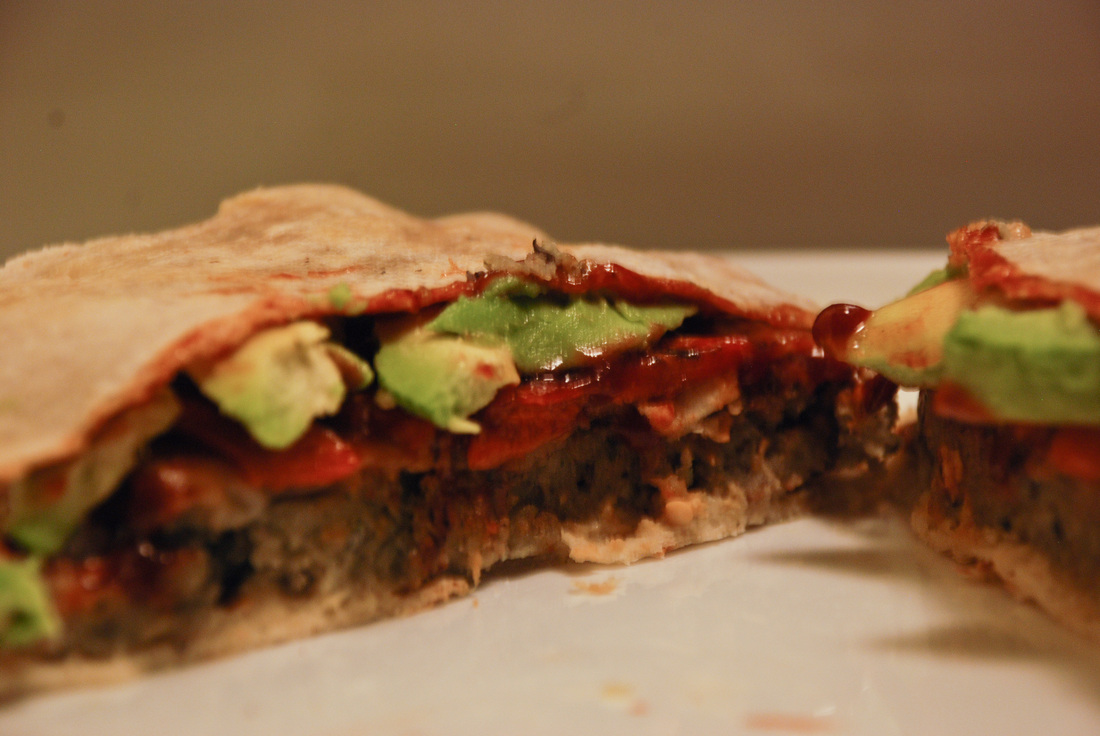
I've said this before, but I love tacos, pizzas, and sandwiches for their versatility. There's no rule that says that pizza has to always be Italian, tacos Mexican, and so on. They are great blank canvases where you can add whatever flavors you would like! In this pizza I went BBQ style.
Picture
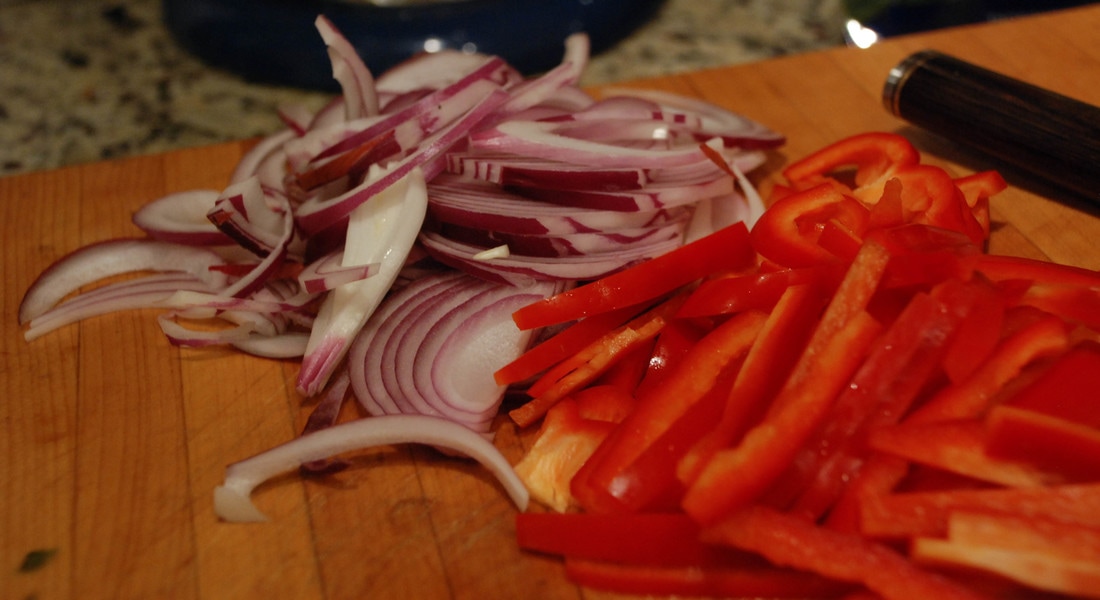
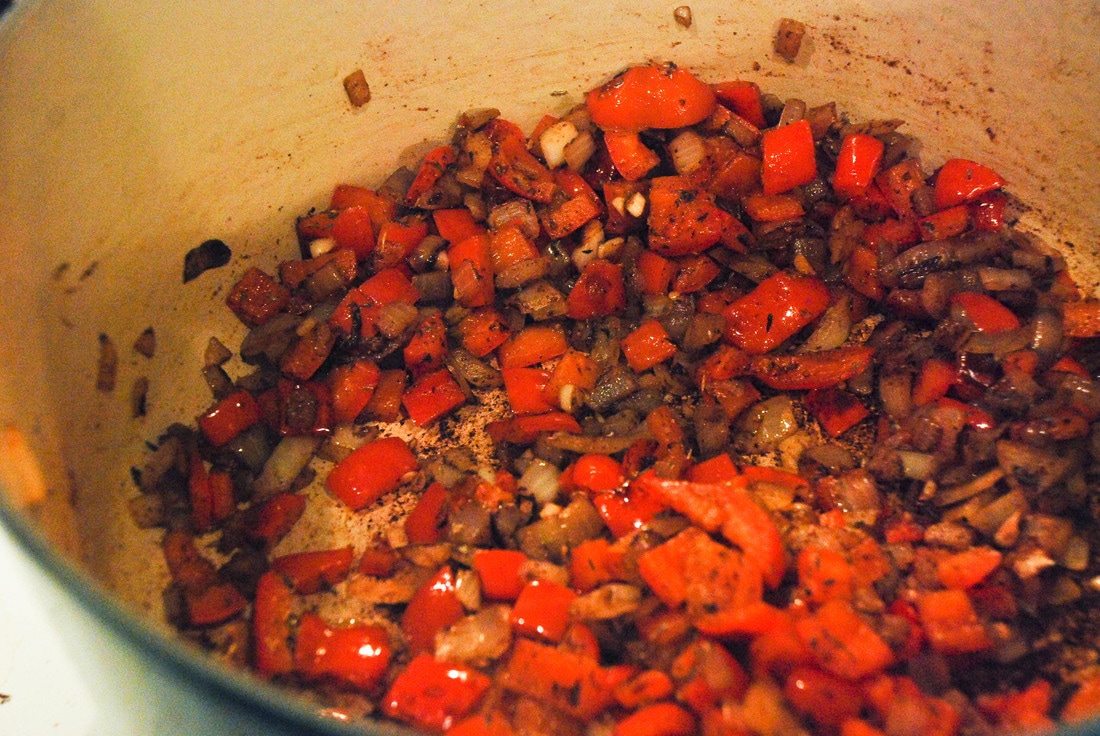
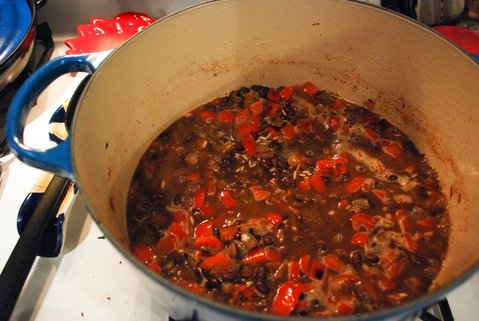
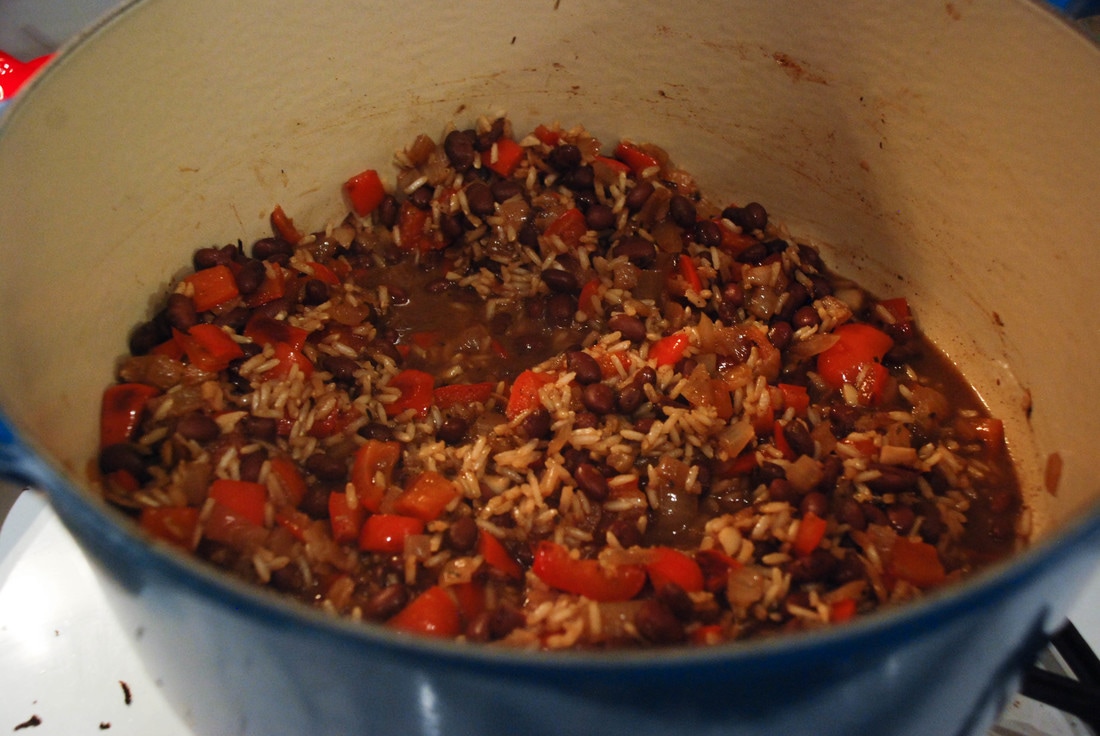
 I used BBQ sauce as my base and added veggies that I typically associate with BBQ meals (and had in my freezer) - red onion, corn, broccoli, and edamame. If you have another type of bean on hand, such as pinto, kidney, or black-eyed pea on hand that may be a more authentic BBQ flavor. I did really love the texture of the cooked edamame on the pizza though. Then I topped it off with some guacamole - again not maybe totally BBQ style, but it helped balance out the texture and flavor profile since the BBQ sauce was a thin layer of the pizza. Hope you enjoy it!

Ingredients:
Pizza Crust
1/2 Cup BBQ Sauce
1 Cup Corn Kernels
1 Cup Edamame
1 Cup Broccoli
1 Small Red Onion
1-2 Avocados 
Prep Time:  10 minutes (if using pre-cooked crust)
Cook Time: 15 minutes
Servings: 4
Instructions:

Preheat oven to 500 degrees. 

Prep pizza crust as needed. 

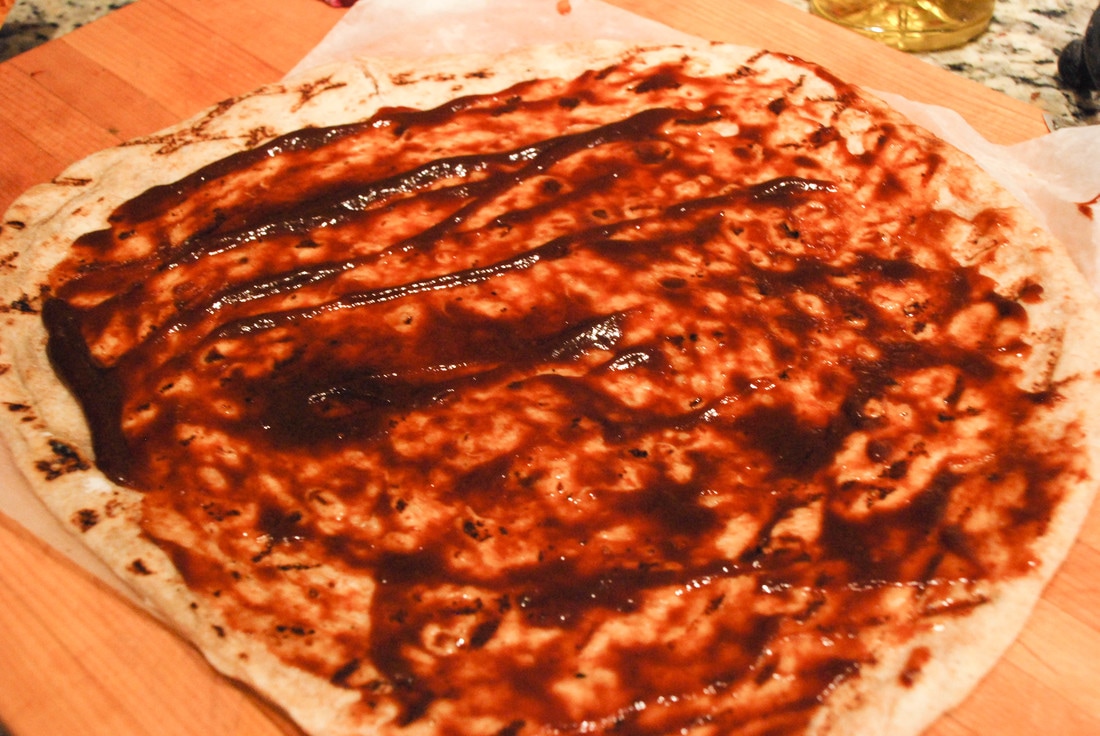
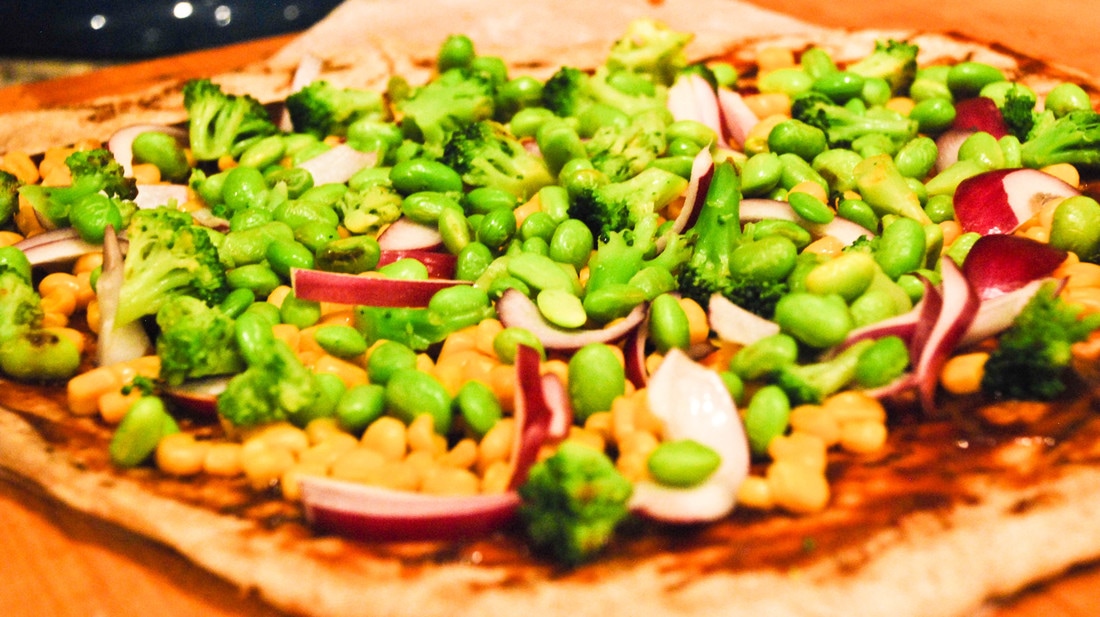
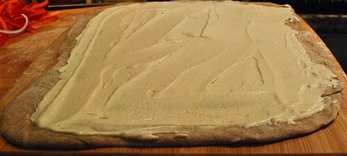
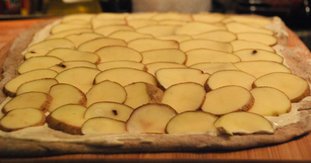
Spread BBQ Sauce on pizza dough. Thinly slice red onion and spread evenly across pizza. Top with corn and edamame. Chop up broccoli and spread evenly across pizza. 

Once oven is preheated, cook pizza according to instructions for the dough, approximately 5-15 minutes. Be sure not to over cook or else you'll end up with burnt crust. 

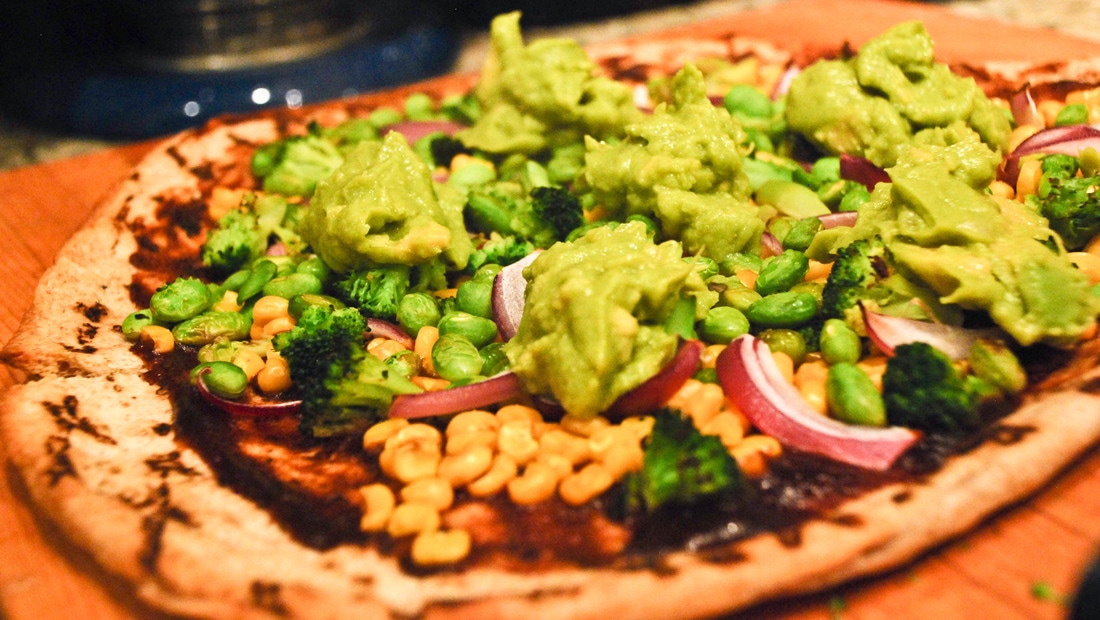
While pizza is cooking, prep your avocado. You could either mash it up and add dollops to your pizza like I did or cut into slices and top the pizza with your slices. 

Once the pizza is ready, top with avocado, serve, and enjoy!
Picture
0 Comments

Buffalo Cauliflower Bites

3/1/2017

0 Comments

 
Picture
I made cauliflower buffalo wing pizza a couple years ago and since then I've wanted to make cauliflower bites again. We had a potluck at work last week so I thought it was a good opportunity to make it again. I found this recipe from Hot for Food that I used as inspiration. ​We were having a Mexican themed event so I added some chipotle and cinnamon for a little something different. 
Picture
Picture
It make look like there are a lot of steps, but it's a pretty simple recipe to put together. The batter and sauce are easy to mix up and the only other thing you need to do is chop up the cauliflower and dip it in each! Since I was taking this to work I did everything except baking the bites for the last time the night before at home. I put the bites back into a bowl with the sauce and let it sit overnight. At work I baked them for the last time in our toaster oven at work. 
Picture
Picture
Ingredients:
1 Head of Cauliflower
3/4 Cup Whole Wheat Flour
1/2 Cup Sriracha
1/2 Cup BBQ Sauce
2 Chipotle Pepper
2 teaspoons Cumin
2 teaspoons Cinnamon
1 teaspoon Garlic Powder
​1 teaspoon Paprika
Prep Time: 5 minutes
Cook Time: 90 minutes
Servings: 6-8 as an appetizer
Picture
Instructions:

Preheat oven to 450 degrees. 

Chop cauliflower into bite size pieces. Add all of the dry ingredients into a bowl and mix together. Add in the non-dairy milk and water, stir until all the dry ingredients are mixed in. You want to make sure the batter is thick enough to stay on the cauliflower but not so thick that it doesn't stir easily. 

Line a baking sheet with parchment paper. Dip the cauliflower into the batter until it is covered in batter and place on the baking sheet. Make sure you are placing the cauliflower far enough apart so that the batter doesn't blend together or else you will get one big cauliflower bite instead of two separate ones. 

Cook in the oven for 25 minutes. Flip halfway through so that the bites crisp on both ends. 

Once they've cooked, allow them to cool. Blend the sriracha, BBQ sauce, and chipotle peppers together. Put the cauliflower in a bowl and pour the sauce over the bites. Mix well so that they are all covered in the sauce. 

Put back on the baking sheet with the parchment paper and cook for another 25 minutes. 

​Let cool, serve, and enjoy!
Picture
0 Comments

Loaded Baked Potato Pizza

1/16/2017

0 Comments

 
Picture
Pretty much every time I go to Whole Foods I buy some of their whole wheat pizza dough. It's so good and it there are endless options for what you can make with it. At this point I have a bunch of it in my freezer so I decided to finally make some pizza! 
Picture
Picture
This is a combination of a classic Italian pizza, pizza con patate, and a more over the top, American version of a loaded baked potato pizza. Italian potato pizza is very simple and calls for thin slices of potato covered in olive oil in rosemary - which I'll definitely be trying in the future.

I was looking to add more protein and veggies to my pizza, so I added a layer of cashew spread underneath the potatoes and some pepper and onions on top. You can add any toppings you typically put on a baked potato, such as broccoli, fresh chives, or even black bean chili. 

I mention this in the recipe below, but a great addition to this recipe would be another layer of the cashew cheese on top of the potatoes. The sauce gives the peppers and onions something to cook into, instead of just sitting on top of the potatoes. I had one or two that fell off of my pizza since they weren't cooked in securely. 
Picture
Picture
Ingredients:
Pizza Dough
4 Small Potatoes
1/2 Red Onion
1 Red Bell Pepper
1 Tablespoon Dried Chives
Red Pepper Flakes

1 Cup Cashews
2 Tablespoons Nutritional Yeast
1 Tablespoon Apple Cider Vinegar
1/2 Cup Water
Prep Time: 1 hour waiting, 15 minutes working
Cook Time: 15 minutes
Servings: 6 slices
Picture
Instructions:
Put the cashews in water to soak.

Slice potatoes thinly using either a knife or a mandolin. Make sure that they are all the same width so that they cook evenly. Place them in a bowl full of luke warm water and salt for at least an hour. After they are done soaking, lay potatoes out on a towel and cover with another one to soak up all the moisture. This process gets some of the starch and liquid out of the potatoes so that they crisp better. 

While the potatoes are soaking slice the onion and red bell pepper into thin strips.

Preheat the oven to 500 degrees. 
​
Roll out the pizza dough to your desired shape based on your cooking surface. If you are using a cookie sheet sprinkle some ground corn meal on the tray or use parchment paper to make sure it doesn't stick. If you have a pizza stone, make sure you put enough flour or corn meal on your pizza peel so that the pizza dough will slide off easily when transferring into the oven (admittedly I have yet to perfect this myself as you can see in the post-oven photo). 

To prepare the cashew sauce place all of the ingredients in a food processor or high quality blender (such as a Vitamix or Ninja) and blend until smooth. The amount of water I used is approximate. Add it a little at a time as needed for the ingredients to blend together well. 

Put the rolled out pizza dough on the pizza peel or cookie sheet. Spread a generous layer of the cashew sauce on the pizza dough. Cover the pizza with potatoes, overlapping them slightly. If you have extra cashew cheese you could put another layer of the sauce over the potatoes. I didn't do this but I think it would be a great addition and help keep the peppers and onions on the pizza. Next evenly distribute the peppers and onions over the pizza. Sprinkle the chives over the pizza. 

Put pizza in the oven and cook for 15 minutes. 

Top with red pepper flakes as desired. Cool, slice, and serve. Enjoy!
Picture
0 Comments

Sweet Potato and Bean Hash

1/15/2017

0 Comments

 
Picture
I love cooking a big breakfast on the weekend because there are so many ways to mix and match ingredients to come up with a different twist and flavor each time. This recipe is so colorful and nutritious, full of veggies, carbs, and protein it's sure to be a satisfying breakfast!
Picture
This is a fully satisfying dish if you eat it on its own or makes a great side as part of a larger brunch menu. 
Picture
Picture
Ingredients:
1/2 Tablespoon Olive Oil
2 Cloves Garlic
3 Small Leeks
2 Medium Sweet Potatoes
1 Green Pepper
1 15 oz can of Beans
1 teaspoon Turmeric
1 teaspoon Paprika
Prep Time: 5 minutes
Cook Time: 20 minutes
Servings: 4
Picture
Instructions:
Mince the garlic. Finely chop the white and light green parts of the leeks - once you have sliced the leeks go back over the leek rings with your knife to chop them up even smaller. Rinse the leeks underwater as they can get dirt within the rings of the leeks. Heat the garlic and leeks in a skillet over medium heat with the olive oil. 

Chop the sweet potatoes and green pepper to about the size of the beans, so that everything is a uniform size. Add the sweet potatoes to the skillet and stir them around to let them get a bit of a crisp on the end. Add the green peppers and cook until the sweet potatoes are soft, about 10 minutes. 

Add the beans, turmeric, and paprika. Stir to combine. Once the beans are warm enough to your liking, serve and eat. You can top with your favorite sauce - ketchup, sriracha, vegan ranch dressing - or avocado if you have some.

Enjoy!
Picture
0 Comments

Black Beans and Brown Rice

1/10/2017

1 Comment

 
Picture
A good friend of ours lived in Costa Rica for a couple years after college. Recently we were over at his place and he made us beans and rice for dinner, which he had learned how to make there. It had been on my list of recipes to try that I just never got around to making, but that night inspired me! It was so easy to make, cooking everything in the same pot, and it was delicious! I had worried in the past that the dish was too simple and would leave me unsatisfied, but I was wrong. The rice and beans stick to your ribs, you can add all the veggies you want, and the spices add a ton of flavor. 
Picture
It's been a few months since that night, so I was cooking from memory. Onion and peppers are the standard veggies to add, but feel free to include whatever your favorites are. Same goes for the color of pepper, beans, and rice. If you change out the rice, but sure to make sure you have the right amount of water. Check the cooking instructions for your rice. Mine called for 2 cups of liquid for 1 cup of rice, so I decided to split it evenly between water and veggie broth. For some reason I love adding cinnamon into Mexican/Carribbean type dishes. I don't think it's typical in this dish but I love the complexity that it adds (not to mention the health benefits).
Picture
Ingredients:
​1 Tablespoon Olive Oil
1 Yellow Onion
2 Red Peppers
3 Cloves Garlic
1 Tablespoon Oregano
2 teaspoons Cumin
1 teaspoon Paprika
1 teaspoon Cinnamon
1 Cup Brown Rice
1 Can Black Beans
1 Cup Vegetable Broth
1 Cup Water
1 teaspoon Salt 
1 teaspoon Ground Black Pepper
1/2 teaspoon Ground Red Pepper
1-2 Avocados
1 Bunch Green Onion
1 Cup Cherry Tomatoes 

Prep Time: 5-10 minutes                                          Cook Time: 40-45 minutes                                                          Servings: 4 
Picture
Instructions:
Heat oil in a large pot over medium heat. Dice onion, peppers, and garlic and add to pot. Add spices - oregano, cumin, paprika, and cinnamon. Stir together. Cook for about 10 minutes or until peppers and onions are soft. 

Add rice and stir for about 2 minutes. 

Add beans, vegetable broth, and water. Bring to a boil. Reduce heat to low, add salt and pepper and stir to combine. Cover pot and let sit for 20-25 minutes or until all the liquid is absorbed and the rice is tender.

While this is cooking, chop the avocado, tomato, and green onions for your garnish.

Turn the heat off. Add the ground red pepper, stir, and let sit for about ten minutes.

​Serve, topped with the avocado, tomato, and rice. 

​Enjoy!
Picture
1 Comment

Black Bean Dip

4/8/2015

0 Comments

 
Black Bean Dip #vegan #glutenfree #oilfree
This is dip will fill just about any need you have and overrule any excuse you can come up with:
  • Never cooked anything before? Are your store bought trays the laughing stock of every dinner party? Ease yourself into it and surprise everyone with this homemade dish!
  • Forgot you had a dinner party tonight? Did the dish you plan on making turn out terrible? You have time to make this!
  • Do you have what to eat snack food and not feel bad about it? - This is basically just black beans! Protein and fiber all the way!
  • The only vegan going to an event? Want something small that you can eat as an app and a main dish and other people will like? Here you go! 
I made this dish as I was walking out the door on my way to a dinner party - literally. And not in the literally but not actually, I literally had my coat on and was walking out the door, when I decided I needed to bring something else (hence the lack of photos). It was that fast and easy to make. I even had to defrost my beans - that took about half the time!

We were heading over to a friend's place for some tacos and I was the only vegan/vegetarian going. It was a small event, only about 4 or 5 people, so not a huge potluck where everyone was bringing a dish. I wanted to make sure I had something to eat, but didn't want to bring too much. This was perfect. I was able to share it with the party as an app and then I used the dip as the meat of my tacos.

I dumped all the ingredients except the tomatoes into the food processor and blended them until it was smooth and I was happy with the flavor. We were stopping at the convenience store to pick up some chips and guac, so I grabbed some cherry tomatoes as well and added them to the dish once we got to my friend's place.

So next time you're in a pickle and need something quick, easy, delicious and nutritious - think of making  a bean dip! You can use it as a spread on sandwiches, as a filling in tacos, burritos, or enchiladas, or as a dip with chips or fresh veggies! You could really use any kind of bean in this recipe - black, kidney, white, chickpeas, lentils - get creative! Mix it up!
Ingredients:
2 Tablespoons Hot Sauce
1 teaspoon Cumin
1 teaspoon Adobo Seasoning
1 Can Black Beans
2 Teaspoons Dried Cilantro
1 Tablespoon Water
1 Cup Cherry Tomatoes
Prep Time: 1 minute
Cook Time: 5 minutes
Serves: A big party as an app or use as a filling for tacos. You could probably make about 12 tacos with this.
Instructions:
Drain and rinse beans.

Add all ingredients except the tomatoes to a food processor and blend until smooth. Adjust spiciness and seasonings to taste. Transfer the dip to a bowl.

Dice the tomatoes and them to the bowl, stirring everything together. Serve and enjoy!
0 Comments

Bean and Beet Brownies

3/7/2015

4 Comments

 
Picture
Beans. Beets. Brownies. Yup. You read that right. These brownies have kidney beans and beets in them. Beets are one of the most nutrient rich foods you can eat. Just look at how intense that magenta color is! They're full of fiber, folate, betaine, and manganese. Couple that with the antioxidants from chocolate and these brownies are essentially a health food! I love using vegetables and other healthy ingredients to make desserts because then I can get my chocolate fix in and not feel guilty about it. Plus, many people are intimidated by beets, so this is a great way to add them into your diet or cooking repertoire.
Adding beets and beans to brownies not only adds nutritional value, but also allows you to remove unhealthy ingredients such as eggs, sugar, and oil. You may think that with the low amounts of sugar that these brownies are going to taste like a health food - but no worries, that's what the cocoa powder is for! That flavor is so strong and intense that it completely masks the bean and beet flavor. All you get is the added sweetness from the roasted beets.
Picture
There is a bit more prep work involved than making brownies out of the box because you have to roast the beets. But you can just throw them in the oven and do something else while you wait for them to cook. Many people say to roast the beets with the skins on and then peel them off, but that involves more work waiting for them to cool, which I am not patient enough for. Once those beets are out of the oven I want to start cooking. I use a knife or vegetable peeler - slice off the ends and then peel the skins of the beets. If you slice them a bit then it also cuts down on roasting time.
Picture
This recipe was a big adventure for me because I generally do more cooking than baking. I like being able to tweak things as I go - experiment and fix any flavor or consistency issues. However, with baking you have to get it right in the beginning and then hope for the best! I wanted to make these gluten free, but after adding all my other ingredients together I felt that the batter was too gooey and needed some more substance, so I caved and added a bit of flour. I've failed at substituting gluten free flours for standard flour in the past so I thought I would play it safe and just use regular flour in this recipe. These turned out way better than I thought so I'll definitely continue to experiment and figure out a way to make them gluten free so that they can be enjoyed by more people.
Ingredients:
2 Beets
1/2 Cup Cooked Beans
1 Cup Chocolate Powder
1/4 Cup Brown Sugar
1/3 Cup Unbleached Flour
1 teaspoon Vanilla Extract
1/4 teaspoon Baking Soda
1/4 teaspoon Baking Powder
1/2 teaspoon Salt
3/4 Cup Vegan Chocolate Chips
Prep Time: 15 minutes
Cook Time: 40 minutes
Servings: 16 brownies
Picture
Instructions:
Preheat oven to 375 degrees. Peel and slice beets. Drizzle with some olive oil, wrap in an aluminum foil pouch, and place in the oven for 45 minutes. Place them in a food processor and pulse until fine. You want them chopped up super tiny, but not so much that you make a puree.

Mash up the cooked beans and add the beets to the same bowl. Add the vanilla extract and combine them all together.
In a separate bowl combine all the dry ingredients - chocolate powder, brown sugar, baking soda, baking powder, salt, and flour.

Add the dry ingredients to the beets and beans and mix them all together. Add the chocolate chips and fold them into the batter.

Pour the mixture into a greased (or use parchment paper) 9x9 or 8x8 brownie pan. Bake for 20 minutes or until you can stick a toothpick in the center and it comes out clean.
I've entered this recipe in the Virtual Vegan Potluck 5
4 Comments

Veggie Burger with Crispy Carrots on Tortilla

3/7/2015

0 Comments

 
Picture
This is a story about making something out of nothing in your fridge (or freezer). Coming home after being out of town my fridge was basically bare. I had veggie burgers, but no buns. I had taco shells, but nothing to make tacos with. The only veggies I had were an avocado about to go bad and a carrot that was losing its crispness. Put it all together and what do you get? A veggie burger on tortillas! 
Picture
I sliced the carrot thinly and fried it up in some olive oil to compensate for the age of the carrot and add some crisp to the sandwich. I added some baba ganoush, vegan cheese I had on hand, and topped it with the avocado. It almost looks like it was planned! Just goes to show you that you can make a gourmet sandwich out of whatever you can find in your fridge, you just need to be creative!  
Picture
Ingredients:
2 Tortillas
1 Veggie Burger
1/2 Carrot
1 Avocado
1 Tablespoon Baba Ganoush
1 Slice of Vegan Cheese (optional)
Prep Time: 5 minutes
Cook Time: 5-10 minutes
Servings: 1
Instructions:
Heat a skillet over medium heat and add either a little bit of olive oil or water. Add the veggie burger to the pan and cook for about 5 minutes (if frozen) so that it has a nice crispy edge on the bottom. Flip it over and cook for another 5 minutes. If you are going to add a slice of vegan cheese, put it on about a minute before the burger is done.

Meanwhile, slice the carrot thinly either using a vegetable peeler, mandolin, or knife. Once the veggie burger is done, in a separate skillet over medium-high heat add the carrots to the skillet. They should need long on each side to get a nice crispiness.

Open and slice the avocado.

Ideally your burger and carrots are done around the same time. If one is done earlier then turn the heat to low and cover the skillet to keep it warm. Once both are done, remove the carrots from their skillet and add them on top of the burger. Place the tortillas on the open skillet for a couple seconds on each side, just to toast them a bit. Spread the baba ganoush over over one of the tortillas and top with the burger and carrots. Top with the avocado, any condiment you would like such as ketchup, BBQ sauce, or sriracha. Add the second tortilla on top. Serve and enjoy!
Picture
0 Comments

Mexican Tempeh Panini

2/10/2015

0 Comments

 
Picture
Another sandwich! I have more coming too! I made a lot of sandwiches this week with the great Iggy's bread that I got in my Something GUD box. I didn't feel like cooking much, so sandwiches were a quick and easy way to eat something hearty and make sure my bread doesn't go bad!
Picture
Picture
I already had the Lalibela Black Bean Tempeh open from my Scrambled Tofu and Tempeh sandwich, but the black bean version went great with the Mexican theme of this sandwich! I poured some Alex's Ugly Sauce, Cayano flavor to give it a bit of a Mexican kick.
You can use whatever your favorite salsa is in this recipe - but make sure it is chunky and has some substance that will stay on the sandwich - you don't want to make your sandwich soggy! I used NoLa's Fire Roasted Corn and Black Bean salsa. The chunks of corn and beans were perfect for this situation. The salsa really had a great flavor and consistency. Combined with the hot sauce on the tempeh this sandwich had an awesome Mexican flavor. The thickness of the bread and the tempeh helped to temper the spiciness a bit so that it was just right.

I used the Field Roast Chao slices on this sandwich as well, along with Treeline Scallion soft cheese. Like I mentioned in a previous post, the Chao slices are pretty thin so even though I added two layers I wanted to add some more cheese to help hold the salsa onto the sandwich. The combination worked great. The Treeline soft cheese was similar to a cream cheese so it spread and melted really nicely.
Picture
The end result is a sandwich with a great balance on spice, creaminess, crunch, and meltiness - great texture and flavor all around! Plus it comes together so quickly!
Ingredients:
Two Slices of Bread
5 Slices of Tempeh (I use black bean tempeh, but you can use whatever kind you prefer
Vegan Cheese (I used Chao Coconut Herb and Treeline Scallion)
Handful of greens
1 Tablespoon Hot Sauce (I used Alex's Ugly Sauce - Cayano Flavor)
1/4 Cup Chunky Salsa (I used NoLas Fire Roasted Corn and Black Bean)
Prep Time: 2 minutes

Cook Time: 10 minutes

Servings: 1
Instructions:

Slice tempeh. Place on a skillet with a little bit of oil or cooking spray. Pour the hot sauce over the tempeh. Cook for about two minutes and then flip over for another two minutes.

Slice two thick slices of bread. Place one slice down on your skillet. Top with tempeh. Add one layer of cheese, a handful of greens and a layer of salsa, topped by another layer of cheese. I wanted to sandwich the greens and salsa between cheese so that it would all stay together better. Make sure your salsa is chunky and not thin or else you'll just end up with a soggy sandwich.

Top with the second slice of bread and make sure the sandwich melts together. Carefully flip the sandwich over to toast it on the other side.

Slice and enjoy!

0 Comments

Chik'n and Veggie Macaroni and Cheese

1/19/2015

0 Comments

 
Picture
Yesterday I posted about Chik'n Alfredo Pizza and mentioned how the sauce that I made was double what I needed. I used the rest of the sauce to make this recipe. It was one of those nights where I needed to make something quick and just threw together what I had. That being said, the vegetables I used are totally interchangeable.

I'd just opened the Beyond Meat chicken so I wanted to keep on using it in case it went bad faster once it was open. It was a nice change of pace to the pasta dishes I've been eating recently and reminded me of the chicken and pasta stir fries that dominated so many of my dinners growing up. I've been really impressed at how long this one package of chicken is lasting. According to the package one serving is 6 strips, but I've only been using 6 strips per recipe, which makes it a much more economical option.

As you'll see below, it comes together really quickly. The timing really depends on what kind of vegetables you use and how soft you want them to be. The veggies and pasta cook at the same time, then you add the pasta and sauce to the veggies just to let the sauce heat up, and voila! You'll notice there aren't a lot of spices you add to this dish, because the sauce has so much flavor in it.
Picture
Ingredients:
1/2 Butternut Squash Cheese Sauce Recipe
1/3 Box of Bow Tie (or your favorite) Pasta
6 Strips of Beyond Meat chicken, sliced in thirds
1 Cup Kale
1/2 Cup Sliced Carrots
1/2 Cup Diced Onion
Prep Time: 10 minutes

Cook Time: 10 minutes

Servings: 2 servings
Instructions:

Cook carrot and onions in a pan with a little bit of water until the carrots have softened a bit. You don't need to add any seasonings because the sauce is so flavorful.

Meanwhile cook the pasta according to the package directions. You'll want it a little al dente because the pasta will cook more with the veggies.

Chop up the kale and add it to the pan once the carrots and onions are just about done. Add the pasta and sauce to the pan with the veggies and stir all together. Cook until everything is warmed.


0 Comments
<<Previous

    Author

    This blog is about my adventures adhering to a plant-based diet in a meat-based world and incorporating vegan practices into more parts of my life. As many of my friends and family aren't vegan, and the best part of cooking is sharing your food with others, I try to make recipes that can be enjoyed by vegans and meat-eaters alike. 

    Picture

    Categories

    All
    Acorn Squash
    Appetizers
    Apples
    Asian Inspired
    Avocado
    Banana
    Basil
    Beans
    Beets
    Bell Pepper
    Beyond Meat
    Blueberry
    Boston
    Breakfast
    Broccoli
    Brussel Sprouts
    Butternut Squash
    Cambridge
    Carrots
    Cashews
    Cauliflower
    Cheese Sauce
    Cooking Greens
    Corn
    Cranberry
    Delicata Squash
    Dessert
    Edamame
    Eggplant
    Gluten Free
    Grains
    Green Beans
    Ice Cream
    JayApproved
    Kale
    Leeks
    Macaroni
    Mushrooms
    Noodles
    Nut Free
    Onion
    Orange
    Pasta
    Peanut Butter
    Peanuts
    Pear
    Peas
    Pesto
    Pie
    Pittsburgh
    Pizza
    Potato
    Quinoa
    Restaurants
    Rice
    Sandwich
    Seitan
    Sides
    Slow Cooker
    Something GUD
    Sour Cream
    Soy Free
    Spaghetti Squash
    Spinach
    Stew
    Summer Squash
    Sun Dried Tomaotes
    Sweet Potato
    Tacos
    Tahini
    Tempeh
    Thanksgiving
    Tofu
    Tomato
    Veggie Burger
    Zucchini

    Archives

    March 2017
    February 2017
    January 2017
    July 2015
    June 2015
    May 2015
    April 2015
    March 2015
    February 2015
    January 2015
    December 2014
    November 2014

    RSS Feed

Powered by Create your own unique website with customizable templates.